Every part of the country has some weather. Even places where it snows, sometimes they get so much that it cant be handled. I worked with a guy from North Dakota who said that they kept an emergency kit at awork. If it was too windy, then they were not able to leave the plant due to visibility of the roads. Everyone would have to stay put until it was possible to get replacements.
That meant they kept some cold weather gear, a pantry and some bedding. We are expecting about eight inches of snow tomorrow with temperatures that will remain below freezing all day for several days. Thanks to the foresight of our ultra woke government pushing climate change agenda, they have not collected enough gas tax revenue to fund only the necessary road maintenance. This means plowing the highways that are east-west corridors.
What I am saying is expect an ice rink on the roads for a few days. That means the smart money is preparing now, while there is still time. It is not forever, just a couple of days. But, that is the point. If it is going to be a zombie apocalypse, then there is nothing to be done but accept the fate. But, as long as a couple of days we might as well limit the interruptions.
So, what does that look like? I think that you are smart enough to figure it out but nevertheless, I am going to put out some reminders.
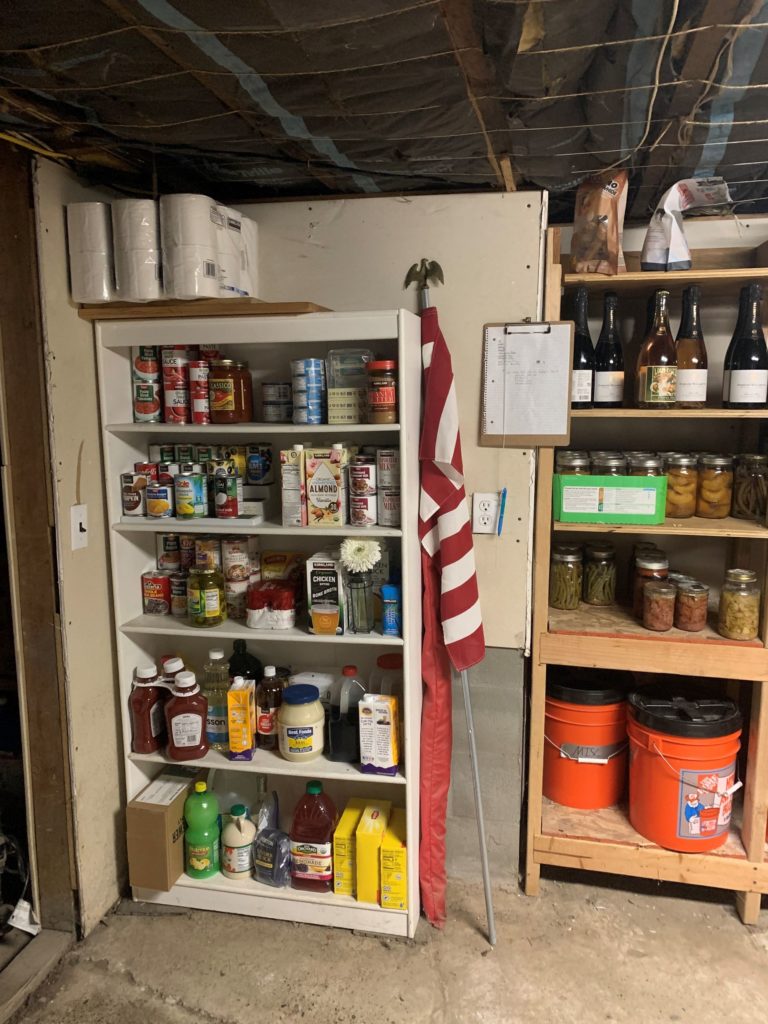
- Have a menu planned for the duration of the event. Purchase things to fulfill that
- Pickup prescriptions early if you can or at least ensure that you have enough to span the event.
- Instead of snow it could be ice and with ice comes potentially larger problems like power outages. Sometimes for weeks. It is a great time for fuel for heaters and generators.
- If you have generators and fuel make sure your extension cords are in good repair, you have enough and can reach what you would like to power.
If you must travel, make sure your vehicle is prepared. It is possible to drive in the snow and ice. I personally have snow chains just in case. People that often drive in this weather like snow tires because they are a large improvement over regular tires and not near the hassle of chains. That being said, the tire shop will be a mad house, budget hours more than normal. Speaking of vehicles, here are some more things to consider.
- A weak battery is a huge liability. If you have been struggling with one, expect the worst.
- I have an ice scraper in the car. I use it from time to time here. The best ones for snow combine scraper with a snow brush.
- I am assuming that I am talking with infrequent winter travelers. Other vehicle preparations are many but it having a tow strap, shovel, traction media, flares and the capability to leave the vehicle if the situation warrants. This goes without saying that other winter preparations like antifreeze, etc
The decision to leave or stay with the vehicle is complicated. Generally speaking it is better to stay with it unless you know where you are going and it can be safely and successfully navigated. Walking home because your car is in a ditch, walking home out of the woods for days is not a good plan.
Careful for slips and falls. I have a shovel to clear paths and a bucket of salt at the ready. Speaking of the outside, be mindful of pet’s water freezing or anything else for that matter. For goodness sake, disconnect your garden hoses from the source. I have frozen pipes twice because of that.
I also need to be mindful of my sump pump. The outlet will freeze causing the pump to deadhead. That needs to be unplugged until the temperatures go above freezing. Be ready for the thaw because all of that formerly frozen water is coming but if the pipe is not clear, here comes the flooding. This requires thinking on your feet when this happens. So, the freeze is one thing but preparing and handling the thaw is another.
End Your Programming Routine: Hopefully, this is just a sledding opportunity and a some cabin time. But if not, then it never hurts to have situational awareness and the ability to do something about it before that decision is made for us. And maybe if you are not already into preparedness, this is a small taste to a better life.


Recent Comments