Category: Projects

April 5, 2021- The Wire Monster

I am trying to figure out where to go from here. It is increasingly difficult to prioritize the time to write, balance family time with work and accomplish all the other tasks that need to get done in life. More specifically, to what end? I didn’t start this because I was bored in life, I started to try and build a career replacement.

Maybe I didn’t use my time as effectively as I could have when I had it. I certainly was slow to get my domain started and branch out. I am not aggressive about the business aspects. The truth is, I have discovered that I really don’t want to participate in social media. I find the interaction a chore and somewhat detestable.

I guess that I would compare social media to shopping at Costco. Many people I know like to shop at Costco. There are some nice things about it, but high on my list is consistency of availability. I never know if what I want is available. I never know if what I want to see on social media is available and I don’t want to spend my time ‘shopping’ just to see.

Just like other social media, my branding has been a little all over the place. I suppose what I was trying to accomplish was interweaving life with skills. I have not been consistent with my delivery of good skills based content and have wandered quite a bit, particularly since I finished my remodel. I am making no promises here, but since I have a project going on, I should take advantage of the fact.
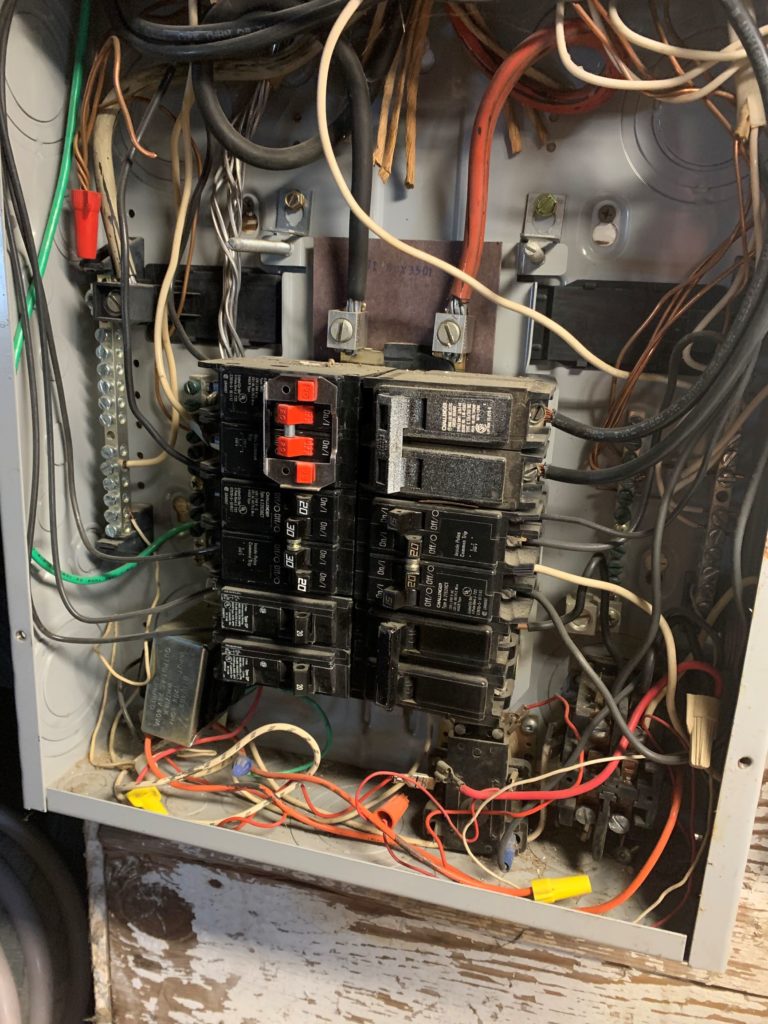
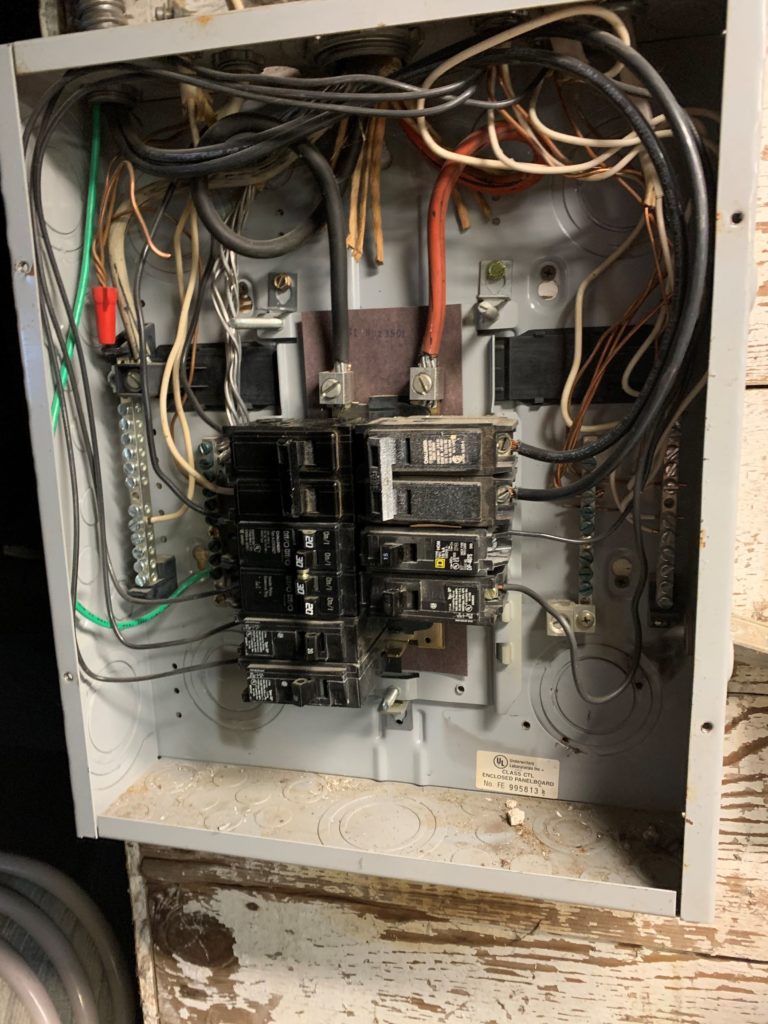
Since I spend a lot of my workday being cold, getting heat is a priority. I was looking at my subpanel trying to figure out what the unmarked breakers were and what space I had available. The upper left 20A 240V breaker was wired to a baseboard heater that is no longer installed and the target of my interest. But further to that, why did I have so many 240V breakers?

I found that I had one 20A 240V breakers un-used and one 30A 240V breaker empty. On top of that, there was some curious wiring. One leg of the bottom right 20A 240V circuit was tied to a relay and two 12V transformers that didn’t go anywhere. My speculation is that this has been an electrical free for all.

The DC wiring I think was for an internal vacuum system but I really don’t know. There is also heat tracing on all of the piping in the basement has not been connected since I have lived here. Maybe that is the reason? I was going to cleanup everything, but ultimately I decided to disconnect and remove all of the low voltage stuff. I have lived here over sixteen years and never knew or needed it, it is not likely I was going to miss it.

So, I have my circuit for my heater and I have space to add an office specific 20A circuit and I simplified my panel. I have built my Bill of Materials and made my cost estimate. It is almost time to really get started.
March 8, 2020- It’ll do for now

I suppose that you could say that this is my second official weekend since I began my new job. While working for Amazon, I don’t think that I had an entire weekend but I did have blocks of two consecutive days off, I just never really knew when they would be. We would get our schedule for the next week (starting on Sunday) on Friday. I pretty much kept every kind of planning in limbo.

So, now that there is some normalcy, I am feeling the pressure to get stuff done when I have the time. It is also the appropriate kind of stuff that needs to be done like I finished pruning the apple tree on Saturday. I needed light, I wanted reasonable weather and I needed it to be done before it starts budding out, which is coming fast. One more thing about that, I haven’t done that job in probably over ten years, it took a lot more effort than I remember or expected.

I have stated that building an office is a priority. I can’t build an office if I am spending all of Saturday pruning and all of Sunday with the family. I talked about pruning already but my boys have a campout this weekend with the Boy Scouts and despite all of our previous efforts, they still don’t have adequate gear. We had to get that sorted out before next Saturday because they need pack weights and meal plans to be made, etc.

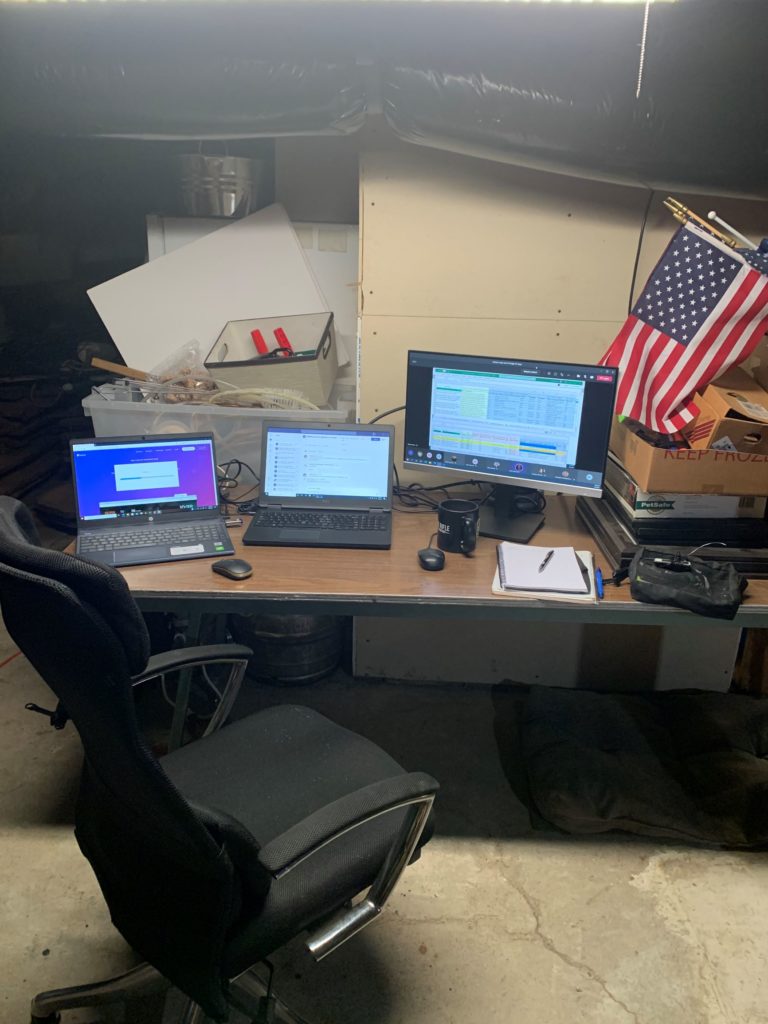
For the last couple of weeks, I have been working off the dining table. That works to a point, but we need that space to eat. That means that I am daily setting up and tearing down. I have also added an extra monitor to my routine because the workspace on a single laptop display is not good for comparing two documents or having a meeting and viewing other documents at the same time. For productivity reasons, I needed an office sooner rather than later.

I decided last week that part of what was holding me back on starting was that it was such a mess in the basement. Stuff is piled everywhere. One thing that I have to do during the rainy season is make sure that anything that could get damaged is off of the floor. That leads piling stuff on stuff to protect our precious junk. It is not just that, it is also I am the only one who manages anything in the basement. It becomes the refuge everything that has been rotated out of service, but still has value including nick-knacks, clothes, seasonal items, etc. I cant even start until I have room to start and I have no room to start.

Sunday night, I started clearing the way and just organizing. I thought that if I could just clear enough space to work, it would also help get me motivated to continue. The other bugaboo is that the basement is essentially unheated. It is tempered by being mostly underground and there is some leaking heat, but too cold to want to sit for hours. I figured that would also push me to work faster. Here is what I came up with.

After sitting through my first one hour meeting, I knew that I was going to have to make some changes to the heat situation. I have a sweatshirt and a jacket on as well as wearing a hat. My upper body is OK, but not my legs and feet. I have a baseboard heater that I salvaged out of the apartment remodel that I was planning on using in the office, but I need heat now. I also have an empty 240V circuit that had a baseboard heater in the bathroom which I removed years ago because the bathroom has central heat now.

I quickly wired the baseboard heater under my computer table to see if that will make a difference, I think it will but I need to be more in front of the heater and not to the side like I am currently setup. So, more junk organizing to come. I may also need to add some deflectors to keep the heat originating under the table and not defusing in all directions.

I will want to shut-off the heat at the circuit breaker each day because a baseboard will continue to heat if the temperature drops below a minimum level, nominally 50 degrees F. I also want to get a thermometer down here to monitor the daily temperature swings with and without heat. My ultimate office plan includes insulation, so this heater will be completely adequate for that use but there is no way for it to warm a leaky basement. Right now this is only a comfort measure.

December 16, 2020 – Light and Indoor Painting Tips

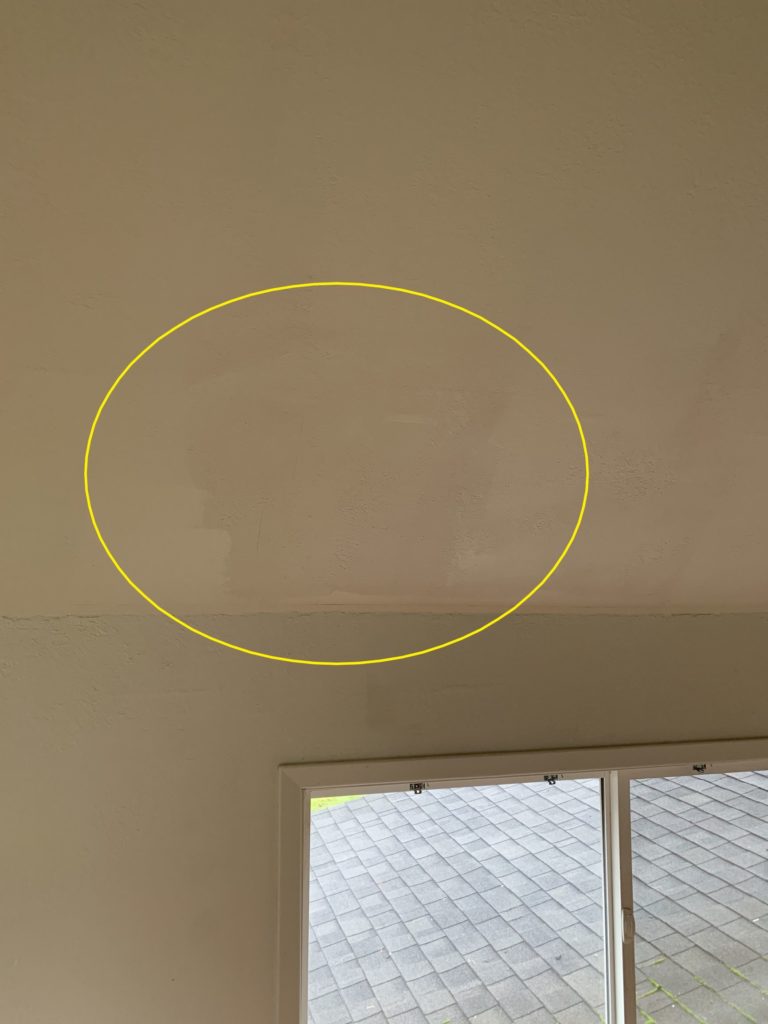
Recently, I was helping my wife paint her office. We were painting after dark with artificial light. It was also white over white. I was trying to use the ‘force’ to make sure that I did a good job. Everyone knows that it can take a long time to master the force.

You would think that when you are painting a very similar color over another, that you wouldn’t have to be that careful when painting. That is not exactly true because depending on the lighting situation, the spots telegraph through. When painting with artificial light, the glare masks the missed spots or really light spots.

I really prefer to paint in natural light to begin with, but that is not always a surefire solution. I noticed when painting the lighter over the darker, I needed the artificial light to see the spots I needed to touch up. The point that I am trying to make is that you will probably need to use different lighting conditions to validate your paint job is the best it can be.

When it comes to paint, I can provide some tips as well. I hold a pretty tight opinion of exterior paint but for indoor the brand is not as critical as long as you accept some things.

  • Indoor paint has must less performance requirements than outdoor paint. I would keep the price above $25/gallon and you will get a decent product.
  • Cheaper paint uses more cost effective materials. So, in that $25/gallon range you are likely going to get a PVA (or blend) versus and acrylic. Excellent scrubbing capability but will yellow when exposed to UV light.
  • There is a place for solvent based paint on the interior. That is woodwork and cabinets or things that are going to be touched frequently. Without an absolute cure time of several weeks for waterbased that paint tends to stay gummy.
  • The paint job doesn’t have to last a lifetime. You might want to change the color or sheen after ten years. Plus, who really scrubs walls anyway?
  • I like the look of flat paint the best, but plan to touch up spots periodically. The pigments used in flat paints don’t reflect light as well and also tend to absorb dirt on contact.
  • To mask or not mask opposing surfaces is a personal choice. I find it much faster to cut in with a brush carefully than to mask in most cases. I would mask when spraying, but those people are probably not reading this. Windows included. I can scrape off glass with a razor faster than masking for sure.
  • Buy quality tools and supplies to do the job. There is very little overall cost to the project in a $5 brush and a $20, but with proper care, the more expensive one will last nearly forever and do a better job.
  • Off-white masking tape versus blue or green. The off-white is less expensive and uses a solvent based adhesive. That adhesive can get oxidized and leave residue or not adhere properly. If used fresh and removed quickly it can save some money but not if you are going to leave it up for a month (potentially)

This is a good starter list of tips. I think most people know how to do this but maybe you learned something too.

December 11, 2020 – Recycled Floor, Good For the Planet and Good for the Wallet

Maybe I will sound like a broken record but I am not going to apologize for how busy I have been. Between working 10-12 hour days, my wife wants her office done. Not only that, but there is a lot of Christmas stuff to do and I am trying to carve the time out. The frequency of blogging is suffering a little temporarily.

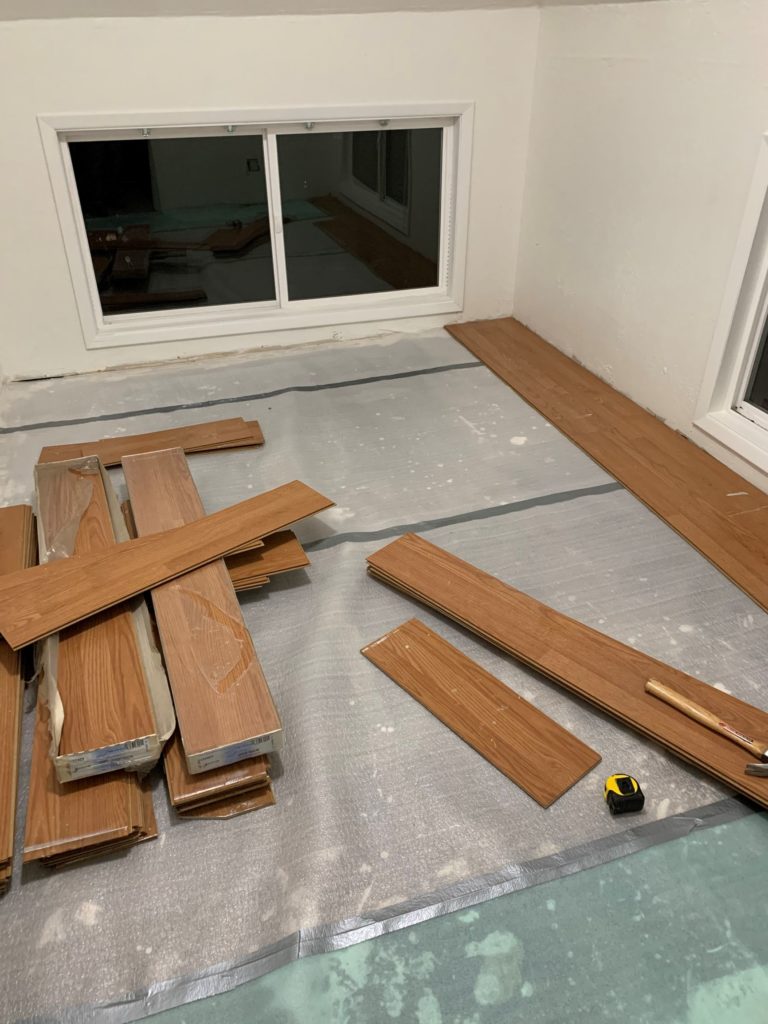
Two years ago, the room in the picture above was our walk-in closet. It was originally a small bedroom that we commandeered when our kids were born to move upstairs with the rest of the bedrooms in the house. As they have gotten older, we wanted a little distance and moved back into the master bedroom which we previously converted to a TV room. We did a swap and now our bedroom is now the kids TV room.

I took down the wire shelves and filled the holes and fixed the worst of the crappy drywall job that was done. We replaced the carpet in the TV room, but we were trying to save some money so we came up with the idea of reusing flooring that I removed out of the apartment this last summer.

Originally, I was going to save the floor because we were out of dumpster space and I was in-between donating it or maybe building an office so that I had a dedicated place to work. I also had some new planks that I had reserved in case I ever needed to do some patch work. After being installed for twelve years, I figured we probably didn’t need to hold on to a bunch of extra material.

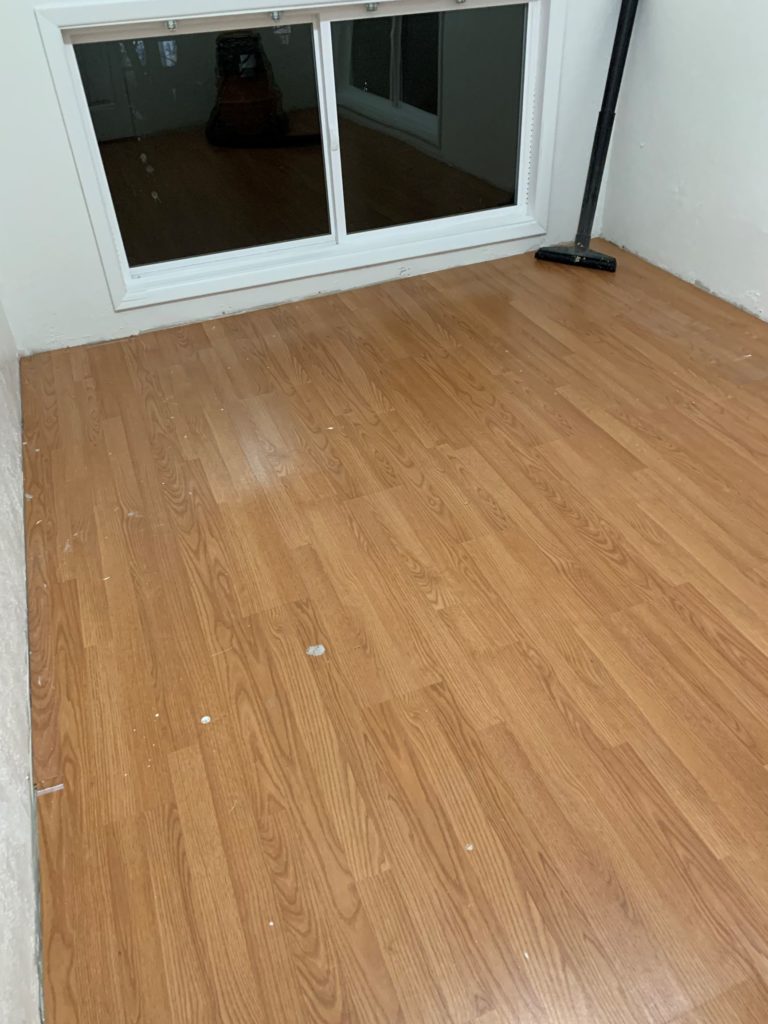
I promised that I would finish the floor on Thursday because I worked today (Friday) and tomorrow. So, that is what I did. This floor cost me $30 to install because I didn’t have enough underlayment.

Now, we have a little clean-up to do. I didn’t handle it with the greatest of care when we decided to replace it. There is a little paint slop on it because we didn’t remove the floor as soon as we should have out of the apartment once we decided to replace it. It’s going to clean up though with an hour or two of effort.

Before I finish, I wanted to take a minute and recommend Habitat for Humanity as a source of used building materials. It is not my go to source for things, but sometimes it is a really good value. For instance, I bought a partial spool of wire, still 100’s of feet for $3. I am going to use that to build an AM antenna soon. I have bought windows and electrical fixtures when I really didn’t want to pay a lot for them. You need to go in with an open mind, but really they have almost anything you need including appliances and lightbulbs.

Another idea I have heard about is people buying used insulation. It comes from old commercial jobs. There is also architectural salvage places that save details and period craftsmanship for people that live in old homes (like mine). Bricks and other stones are resold, I haven’t personally seen this other than on This Old House.

Hopefully, I have inspired you to make something new again. I know that I personally took pleasure in clearing up some space in my basement and I think that it looks nice too.

December 9, 2020 – 6AM Christmas Tree Decorating

It is probably an understatement that I have been busy lately. I just came off of three days off and I barely had a minute to do anything other than the the things I have committed to. We are working on my wife’s office, selling trees at the Boy Scout tree lot, yard work and other seasonal activities.

For those that know me, they wouldn’t be surprised if I admit that I am kind of a Grinch. That being said, I am also a traditionalist. I am not happy to put up outside decorations or inside for that matter. But, I will never give into the artificial tree movement for the reasons that it is not right.

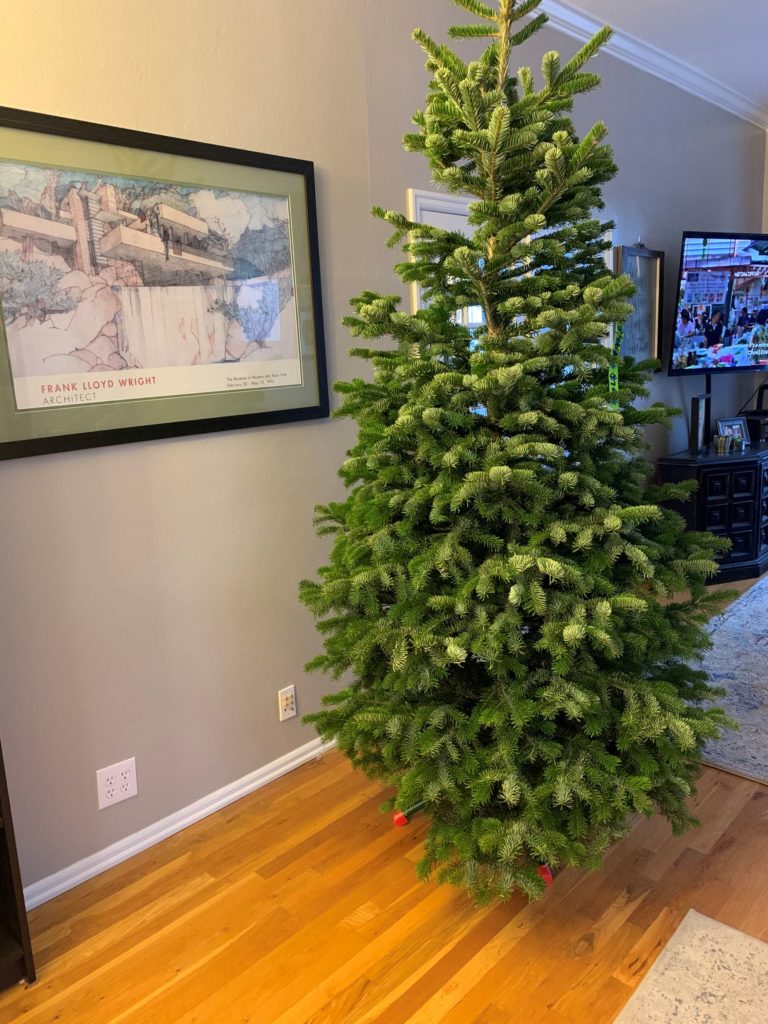
We have had the tree in a bucket of water for over a week now. Because getting the tree up requires my muscle, the only time I had to do it was before work, so I started working on the tree at 6:30AM.

Because I live in Oregon, natural Christmas trees are normal. I didn’t see an artificial tree until I was a teenager at least. I know that a lot of people live in places where you can only buy a tree from a lot, because it was shipped in from somewhere else. However, I thought that I would provide some tips about Christmas trees just in case.

Getting a wild tree

I have done this a number of times. I would have to say that far and away, this is my favorite tree activity. Permits can be purchased for $5 from the US forest service. You go up to the national forest and you find a tree (that is in the national forest boundaries) and you cut it down and take it home. They will provide you with a map and some suggested locations to get started.

  • Check the weather. Early snow can make access difficult to impossible. Nobles tend to be at high elevation, above 4000′ are are the first to lose access.
  • Plan for adventure. Bring supplies like lunch and drinks and tire chains as well as saws and straps to get that tree. But also think about sleds and possibly campfires. This is an outing more than a to do.
  • Don’t push it if you start to see snow. This can turn deadly if you don’t respect mother nature.
  • Wild trees are spindly and sparse. If you are into that, then your in luck. Some varieties like Douglas fir can have pretty wimpy branch strength.
  • There are some limitations. Trees have a slot window (bigger than, smaller than Y) for harvest. They must be a certain distance from the road and stumps need to be cut to the ground. It is surprising how big trees really are when you get up to them versus at a distance. This can make the hunt challenging, but rewarding.

Going to a tree farm

This is typically our go to. You go to a place that grows a lot of trees and you cut it or someone else does. Often times they are geared toward the younger family set with Santas or tractor rides and such. Think of it as the Christmas version of the pumpkin patch.

  • Dress for the weather, the fields are often muddy and wet.
  • Help is usually available to bale the tree so that it is compact for travel. They can help load it or secure it to the vehicle as well.
  • I find this a little monotonous. You can most likely find the tree that you want, size, variety and look. But, they all sort of blend in together after a while.
  • This will likely be the cheapest tree to buy. You are not paying the fuel to go into the mountains and you are not paying the lot mark-ups.

Tree lots

Press the easy button on getting a Christmas tree. Pull in, look around, pay and go. My boy’s Boy Scout troop operates a lot every year. We spend a fair amount of time working the stand and plenty of people buy trees that way. We did this year too.

  • For best selection, go early in the season. If you are looking for something larger or a particular variety, it pays to buy early. The business aspect of this leads inventory to shoot for the biggest sellers and to sell out if possible.
  • Price shop for the best value. There are very few options in our small town as most of the competitors have gone away over the years. But I have seen a range of prices that vary from “I can’t believe someone would pay that” to “we don’t even buy them at that cost”.
  • Most tree lots are fundraisers for programs (in our area). It doesn’t feel so bad to pay more when I know the profits are supporting good causes.
  • Tree lot trees can be cut over a month ago. If you live somewhere outside of the pacific northwest, tree cutting for Christmas trees begins November 1 for destinations like California and Panama (really? Yep). I can say for our tree lot, I saw the trees cut and then I hauled them to the yard that day.

I was going to go into tree care, but this is already getting long. So, I will save it for another day. I hope that if you haven’t gotten your tree and you don’t have an artificial one that you will get it this weekend. I think our stand will be out of trees by the end of Sunday.

November 24, 2020 – Mantel Project is Complete, More Have to Want it

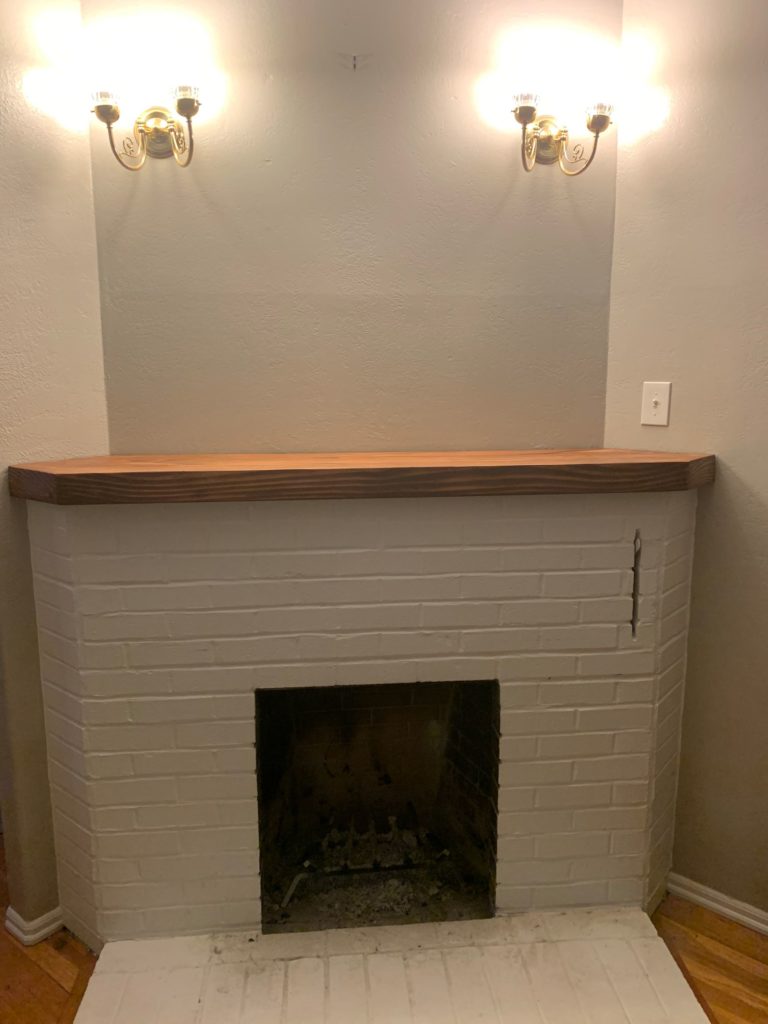
I finished my mantel project on Sunday. I kind of fell off of keeping track of my hours and I definitely didn’t hit my target date. I suppose if you are keeping up with the theme, I didn’t really want to.


I had other things that I would rather do. I had bids that I needed to get out. I had interviews to attend, I had blogging I wanted to do. I had other things that I had to do like hanging light fixtures, moving furniture for new carpet and assembling new furniture.

As with all projects, I ran into some things that didn’t go exactly as I expected. I was going to use a special router bit to make the 45 degree miter stronger, but I found the setup to be way too fussy without a proper router table. I also found that the air dried fir was too brittle to precision route an touchy joint. Those kind of derailments made me pause for a new strategy and that kind of pause put the brakes on momentum of the project.

To be truthful, I am looking more forward to the table that I am going to build next. I built this one first to get it done because the next project is going to be significantly bigger. I will need to do some more planning to get a more accurate estimate of how long things are going to take. One thing for sure is that I am not going to have the kind of time that I had previously.

With the holidays approaching, there is always significantly less free time. I also took a seasonal job delivering for Amazon. I may be working four to six days a week doing that for now. I think it will allow time to keep looking for a replacement job and writing but there is only so much time in a day and week for doing projects.

This is a job that I wanted. Don’t get me wrong, it is my lowest, post college degree paying job by a long shot. But, it is a four ten hour shift a week, turn it off when you clock out kind of gig. It is going to bring in some money consistently and there are worse jobs for less money out there. Believe me, I have been looking.

I have always thought that I would be interested in a job driving. I can download my playlist, listen to my podcasts and get paid to do so. I will talk more about my experience later, but I am thinking that this could be fun for a while.

If you were to ask me what my favorite job was, I would tell you that it was when I was a student janitor my senior year in college. Many people could find the downside in being a janitor, but I actually liked it, a lot. Beside the obvious benefit of getting some spending money, it forced me to budget my time effectively because I worked every week night. The best part was getting away from my complicated cerebral calculus and high level science projects and spend three hours a day sweeping, mopping and doing event setup. I lost twenty pounds, stayed focused and got paid.

I am hoping that this job will be a motivator with some of the same side benefits. In the mean time, I still have some days to do my own business if I get any or work on projects.

November 16, 2020 – Testing some changes and building a template

Supposedly, things are working the way they should. I did finish my post on Friday, not without struggles. Things were adjusted again and I will see if they working better. In technical jargon, there was some caching issues and a bunch of sessions on the server, more than were allowed. I have a hard time buying that, but I guess time will tell.

As another side note, I have discovered that it seems like my maximum image size is 2500×2500 pixels without upgrading server resources (paying more). It seems like I am going to have to edit every image in order to get them to post. I guess where I find this frustrating is that this is not the cheapest plan, I don’t know how the cheaper plans would work beside just plain text or a simple static site.

OK, accountability time. I didn’t finish the mantel on November 4 because I didn’t stick to my schedule. And I didn’t stick to my schedule because I wasn’t feeling like it. Part of my excuses were fiddling around with this site more that I should have. Part of it were other things in life going on and a lot of it was I was just not being disciplined.

That doesn’t mean that I haven’t made progress or that I am not close, because I am. I have the final fitting and the finishing to complete. I think that I should be close by the end of the week. But, what I wanted to talk about today is making a template for the proper fit.

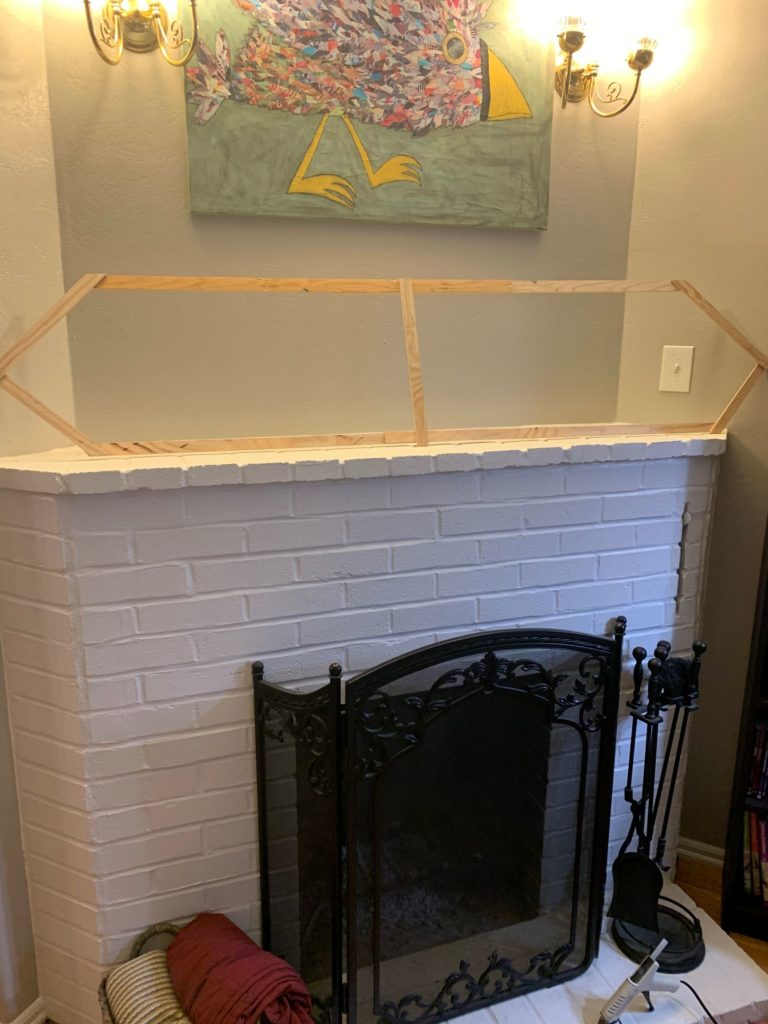
The mantel is not even depth across the width. It is an inch wider on the right side than on the left. I was also concerned about different angles so I built a template of what the top should be so that I could try to get this as close to perfect on the first try. This is a technique that is used by counter makers to try and accommodate for uneven walls.

To build a template, one way to do it is use thin pieces of wood, hot glued together to follow all of the contours and angles. This also helps as a mock-up technique as well to make sure that you have an idea of the proportions of what you are building. This template is then used to trace on your work so that with an accurate cut, you get a perfect fit.

To get the very best fit, the template should be scribed against the wall. Scribing involves using a compass following the wall at a set distance. Once the line is made to fit all of the contours, cut to the line and test the fit, it should fit like a glove. I realize that this is vague and probably warrants a video or separate post. Check this tutorial for a primer.

Templates can also be made with paper or cardboard as well. Use what you have on hand and what is convenient to work with. Take your time and sometimes a template is the right technique to use.

November 7, 2020 – Sunday Bonus: What does a chemical engineer do?

It’s career day at Alt-F4. Well, not really especially since I have never had the title of chemical engineer. However, I have done the job. A chemical engineer does a lot of scaling, unit conversions and process type work. I spent over four years doing very similar work early in my career.

So, why the heck do you really care what a chemical engineer does? Well, from a practicality standpoint sometimes you have to do some unusual stuff. In my case, I am still struggling with the leaf blower, I bought some 40:1 fuel thinking that was probably the ticket. I incidentally ran across the manual this week and discovered that it is supposed to actually take 16:1 fuel mix.

First, good luck finding a 16:1 pre-mix in the store. I don’t think any of the modern engines run that kind of ratio. If you are going to make it yourself, that is 8oz of 30 weight oil to 1 gallon of fuel. I don’t really want to make a gallon especially now that I have almost a full gallon of 40:1 that is not really useable in any of my other machines. Another added bonus is that I could make 40:1 into 50:1 in the same way to use in my trimmer or chainsaw. This avoids having a bunch of cans of different mixes lying around because I don’t use that much anyway.

Another thing that I don’t want to do is leave a bunch of fuel in the the tank. I don’t know when or if I will use it all. So, my plan is to make up 1 cup at a time of 16:1 out of the 40:1 that I already have. I have to do some relatively simple calculations so I can use the equipment that I have to do what I want.

  1. Work in units that are ten based (i.e. metric) for easier calculations

According to the manual, the tank is 16.5 oz. The conversion is 29.57 ml/ounce.

16.5 oz * 29.57 ml/oz = 487.9 ml of fuel in the tank, round up to 488 ml

2. Figure the oil component of the mixtures

If the tank was full of 16:1 mix then I will calculate how much oil that is by dividing the total volume by the ratio.

488 ml / 16 = 30.5 ml oil in a full tank

488 ml/ 40 = 12.2 ml oil in the tank in a 40:1 mix

Now, subtract the difference between what you need and what you have and that will tell us how much straight oil I would need to add per tank.

30.5 ml needed – 12.2 ml have = 18.3 ml oil to add per tank

3. There are simpler ways to do this, but I will do it again for emphasis to make up my mix per cup.

1 cup = 8 oz

8 oz * 29.57 ml/oz = 236.56 ml in a cup

236.56 ml / 16 = 14.79 ml oil at 16:1

236.56 ml / 40 = 5.91 ml oil at 40:1

14.79 ml – 5.91 ml = 8.88 ml oil needed per cup

4. Convert ml back to imperial measurement (teaspoons)

1 teaspoon = 4.93 ml

8.88 ml oil needed / 4.93 ml/tsp = 1.8 teaspoons oil per cup to make 40:1 into 16:1

I hope that I made my point that sometimes this kind of math can be useable. My points for doing this this way is to protect the machine from excess fuel in the tank and using what I already have have.

October 26, 2020 – A little more about project planning, with an actual plan

Sometimes when I write, I don’t have a solid end goal in mind. I am writing against the clock to get my content generated so that I can move on to the next thing. I really wanted to get an example plan made up so that I could show it in action, but I didn’t want to spend the time I needed to make the plan, craft a well written article and also get some other work done.

Maybe it would be better to hold off and write something more comprehensive. But, the way I am working now, I am looking for not letting perfect be the enemy of the good. So, today I have created the plan for my mantel project and I can talk about how I use it.

On Friday, I introduced the concept of work segments (or units as I have written above). Remember that those are the blocks of time that you have to complete a particular task, or tasks that have a natural ending. So, I have broken my tasks down to what I think I can accomplish on a given date (assuming no interruptions) with no more than four hours a day. If I treat each unit as a work day and my work days are Monday through Friday, then I would in theory be completed with this project on November 4.

I want to say a little more about planning. In my past, my experience and expectations as a project manager was to over plan (in my opinion). If you look at my plan carefully, you will see that there are still decisions to be made. That means that my end date could very well slip because I didn’t build any extra time for ordering bits, testing colors or making mistakes cutting parts. I am very close to margins on my whole lumber bill of material which means I may have to mill up more lumber to finish this project. The truth is, I should have done some of this planning before I started cutting and now I am hoping to make it work.

Wouldn’t then over planning play into my benefit? Well, maybe; the devil is in the details. In my opinion, the best plan is detailed enough to guide your work yet broad enough to have room for unanticipated elements or decisions that have yet to be made. I also feel like too much detail leads to rigidity causing too much time fiddling with the plan instead of working. I actually made this plan more detailed that I would normally to illustrate how the pieces should work together and the consequences of how one thing might effect the other.

If this project was a job, once my project roadmap is set, then I would just get started. I wouldn’t spend any more time adjusting mid-stream unless there is a change in scope for some reason like this changes from a mantel to a whole fireplace surround. Once the bid is confirmed, then there is nothing really to do except document the hours and cost against the plan. There is probably another article about dealing with change some time in the future. I don’t see it on this project, but if the opportunity arises, I will write about it then.

This plan is really for my me and my wife, this is her project and she is the customer. I do use this process but the main reason that I put it together is so that I have a way to communicate where I am at on the project, what is left to do, any expenses that may occur and when she can expect that I will be done. She does not get into the technical details of how things get done or what tool/technique should be used, but she does understand time. Each decision of the day potentially has a compromise on the schedule. It means that to get this finished, time has to be allocated in the shop in addition to my other business dealings and family life. I also have a much larger project, the farm table waiting for this to get done.

When it comes down to it, there is no real deadline for this project. But as I said on Friday, without deadlines things tend to slip and this might get put aside for months. If this were a job, I would want to add travel time to get materials, planning time, billing time and build more time into the schedule to account for unknown. That would then go into my estimate for my bid.

I am going to keep track of my hours for my own business purposes because I have largely done woodworking as a hobby, but I would like to have in my pocket the effort of a custom mantel. I would also mention that I have the material already so there is no cost there. All in all, this is probably a $2000 project for a paying customer.

October 23, 2020 – Planning for the end and success

If you are like me, then you then you tend to prioritize the things that you want to do over the things that you don’t want to do. Or maybe said a better way, I deprioritize the things that I don’t really want to do and find lots of reasons to not do them. This has lead to projects literally sitting around in the shop for years.

Sometimes, when these projects are personal you want to get away from rigidity, accountability and structure. It is OK not to proceed with a plan because that is part of the escapism or hobby aspect. Other times, even when the project is personal the shop space is used for business purposes and having partial built projects is going to be in the way.

Today, I am going to talk about building a project plan to get things accomplished in your life. These are the techniques that are working for me.

  • Visualize the End State

This probably seems self explanatory, however you need to know what the end state looks like. What is this job going to create, look like, function or how is this going to benefit me? It helps to have an end in mind when starting a project. Without a definable benefit, I would question that there is value to this project.

For wood working projects, I like to sketch out what I think the end state is going to look like. This helps me select the right lumber I am going to need and keep track of the sequencing as I work through the sub steps.

  • Be Realistic About Your Tools, Space, Skills and Available Time

For me, the biggest gotcha here was not looking at the overall time commitment and just starting on something without regard to how long a project was going to take or even whether this was a priority. I would suggest, look at your schedule and determine what available blocks of time do you have consistently. A 1000 hour project is a lot of nights and weekends.

The reason this step is important and in this order is that later, when you are determining your work segments, you are planning to make success within the time that is available. Let me try to be a little more clear. If you only have one hour a day available, your tasks need to broken down to the point that you can succeed within an hour every day.

  • Create Work Segments That Fit Your Available Time

If you only have one hour a day to work on a project, then your planning needs to be to that level. Since I am probably largely going to work on this project as part of working time, I won’t have that short of constraint. I will use it as an example.

  1. 4hrs – Rough Mill lumber 4x 6″x72″

or

  1. 1hr – Find the rough boards in the lumber pile that will yield 6″x72″
  2. 1hr – Rough cut four boards 6″x72″
  3. 1hr – Joint the four rough cut boards
  4. 1hr – Plane the four rough cut boards
  • Create Your Own Deadlines Using Your Work Segments

You can add up all the job parts and put them on a calendar. That will essentially give you a project time line for completion. Just remember that life is here, I don’t live on an island. I don’t have the luxury of every weeknight and all weekend all the time. I suspect that most people don’t either, so don’t build that in to your plan.

Do also build some extra time into each task if possible to correct mistakes. Unless you are an expert (in which case you probably don’t need this help) you are going to have some things to correct. This is time that can be used to jump ahead in the plan if everything goes well.

I know that once I get things planned, I now want to meet or exceed my own deadlines. That is OK. The point of this whole exercise is to get things done and feel good about it.

  • Socialize Your Plan for Personal Accountability

It is pretty easy to do all the previous steps and still not get things done. You have to be on edge a little bit about whether you are going to succeed to keep you engaged. A spouse pushing is a pretty big motivator, but a social media post or a friend could also work.

  • Keep Track of Your Progress for Future Use

Maybe you just guessed at how long something would take and you were badly wrong. You would want to account for that next time. There is also a piece where experience and familiarity can speed things up so it is helpful to keep track of progress for better future estimating.

There you go, you have just project managed your first project. That is all there is to it. I have used this technique to get un-stuck on projects very successfully. It is also a similar mindset to building estimates for my business.