Tag: fly tying

January 10, 2023 – Fly Tied, #1

As with my philosophy, first build discipline and then proficiency. Well you could say that this is what I did. I wanted to tie a fly that used all of the materials I had on hand (I did have to buy hooks however). I saw no reason to buy more materials when I had plenty on hand. I also wanted to make something that was large. It is easier to do dexterity work when you are not at micro-scale.

I have alluded to this before but it used to be that fly fishing and fly tying was a very traditional endeavor. I have some pattern books, but I just wanted to make something. And what is more flashy then a streamer? These are the peacocks of the fly world. So, I found a picture of something that I liked the looks of and made up the rest.

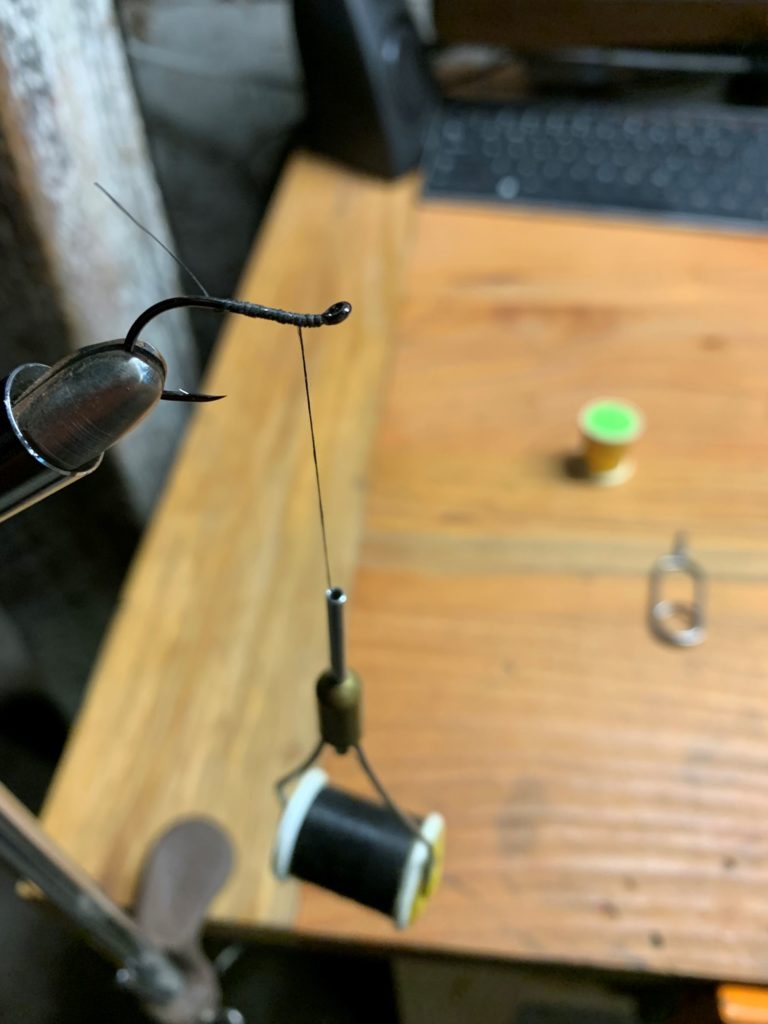
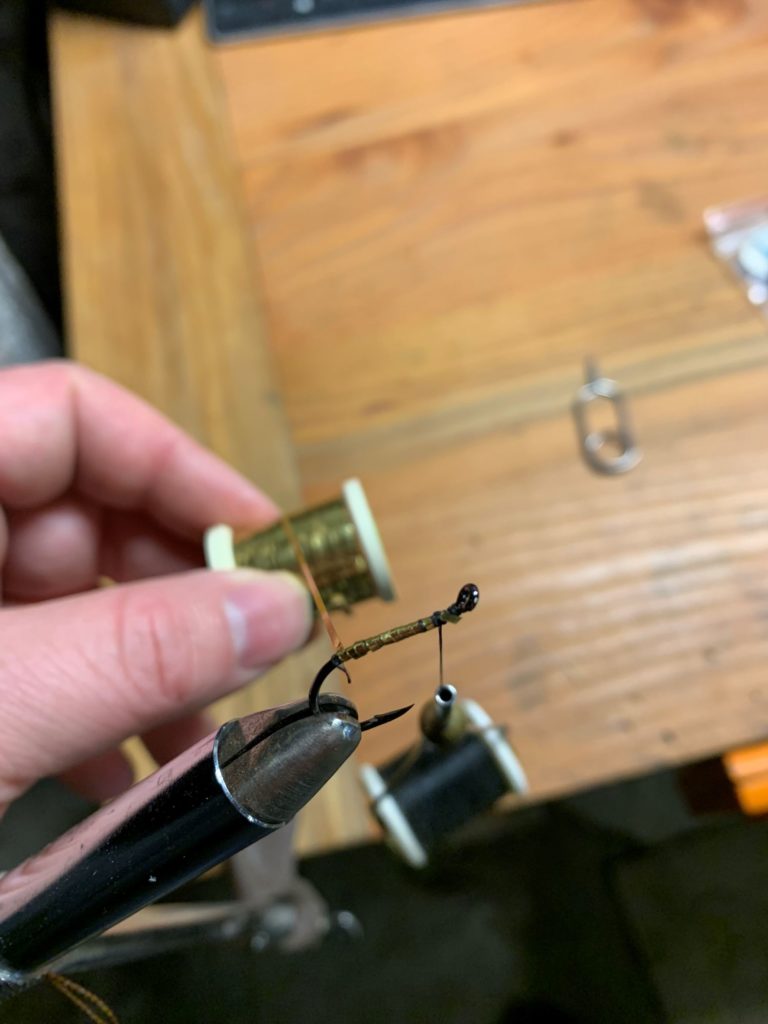
Step one is to wrap the hook in thread as a base layer. Then I put down a layer of gold tinsel. My intent is to have a butt end with some exposed gold.

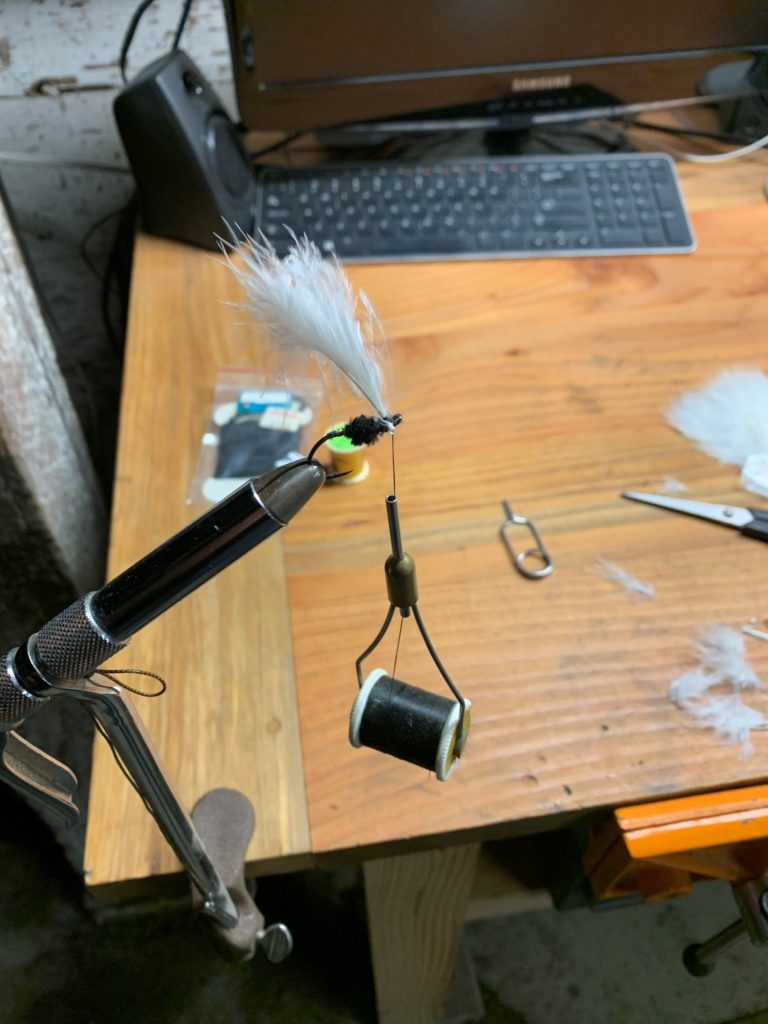
With my base layer down, I added black chenille. That simulates the body of an insect. I probably made a mistake using marabou (feather) as hackle, that simulates wings. Marabou is typically used as dubbing (or adding mass to a body, not as hackle. But remember, I was using what I had on hand.

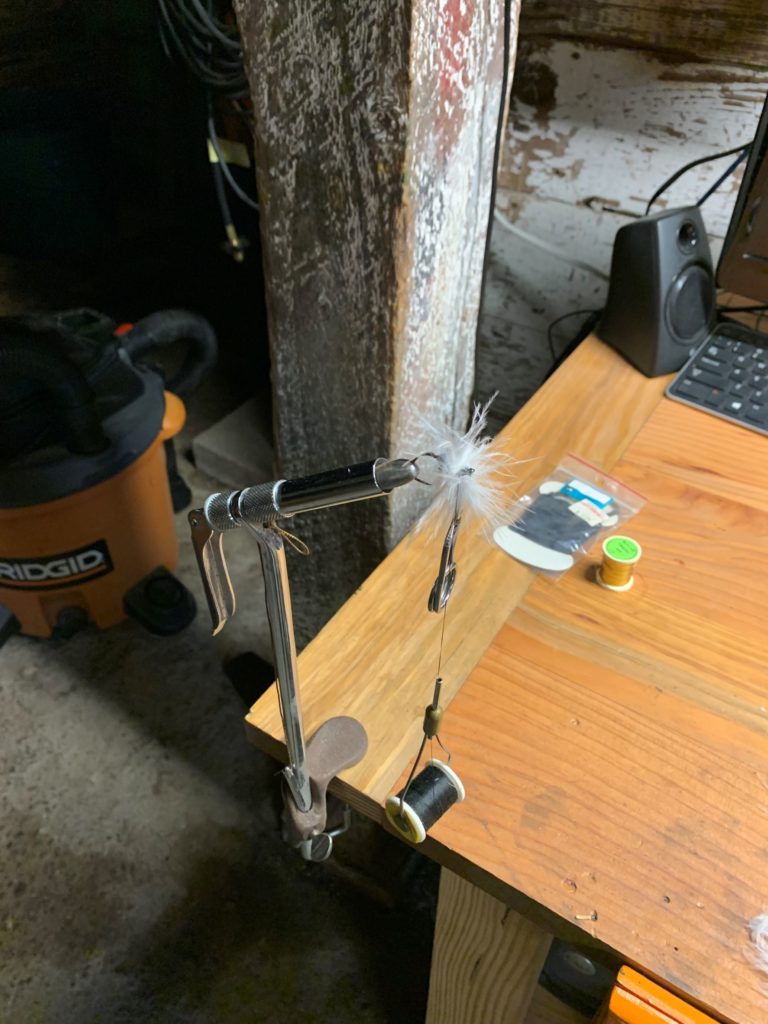
After building up the head and adding head cement to hold it all together. I had tied my first fly in thirty years. Now, it wasn’t super tidy or good looking. I was thinking of naming it something in-appropriate, but didn’t. Maybe you can suggest something funny or unique? I have no illusions that this is the one to knock them dead. But this is the one that got me back into the game.

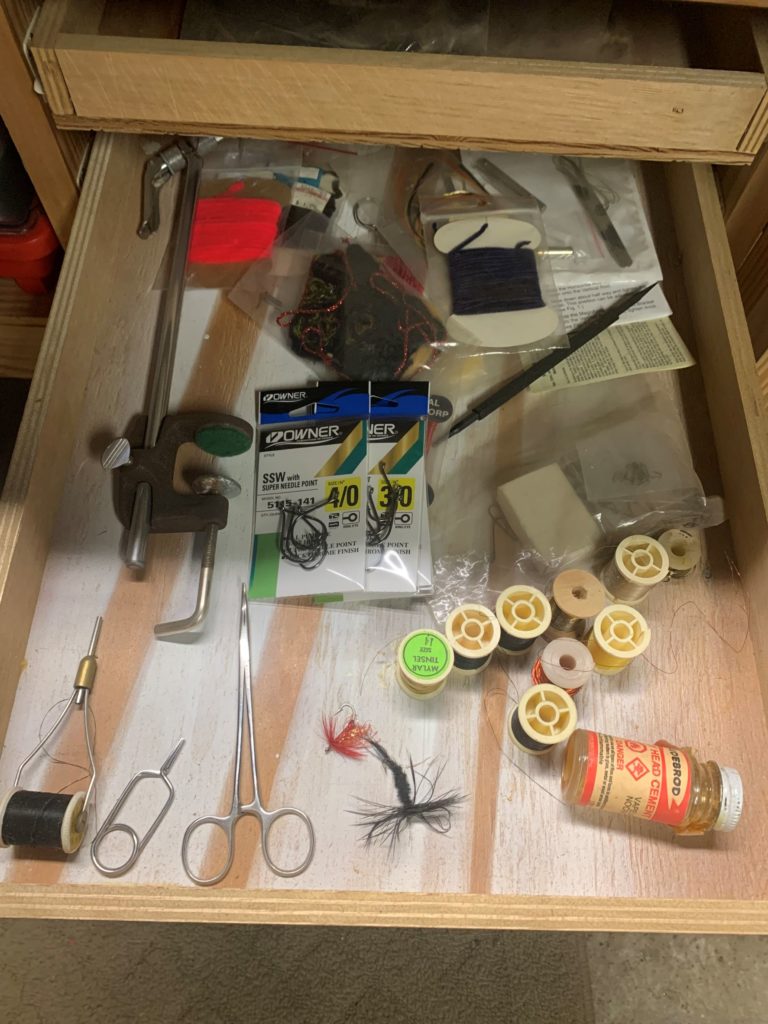
I learned a few things in this trial process. The first thing I learned was that my vice sucks. It essentially free spins with almost no pressure. I sure don’t remember that from the past. It is going to be a while before I actually do anything about replacing the vice. For one, I can’t justify doing something for a ‘someday I might want a better one’. Second, I have other projects/expenses lined up before this becomes a priority.

The second thing that I learned was that I have enough tools to make simple flies. I do plan to purchase more thread bobbins and hackle pliers to have some spares on hand and thinking that I might make more complicated flies eventually. But for now, what I have will work for what I am doing. I will never give up on two is one and one is none in case something gets lost or broken but this should be fine for what I am doing now.

I don’t think the hook I used was proper. The pattern I emulated called for a #3 to #5 hook. This is actually a #2 but it seems short to me. This hook was billed as a bait hook but I think the shank is too short. There are specific or common fly hooks and this was not one of them. So, I think my output would be neater an cleaner if I actually used a better hook. But again, this got me going and I could buy it locally.

End Your Programming Routine: I really wanted to prove to myself that I could still do it. I think that I have lost some skill and technique as well as knowledge after all these years but proof of concept is complete. I am trying to figure out exactly how I want to handle all of this but this is a good start. I am really trying to keep my toolbox fallacy at bay and this is the way that I started.

December 20, 2022 – Fly Tying Basics

I am not tying flies yet. Let’s see if I can shake the cobwebs off enough to get started. On my 18th birthday, I got a class where my dad and I went to a fly tying class for a term. That was a few weeks shy of thirty years ago, I think that was close to the last time I did this. The good news is that this is no longer a dark art. With YouTube and websites, the information should be readily available. I still have my old manuals too.

I suppose the good news is that this is not expensive to get into. Some of the introduction kits are around $50 and have everything that you need to start and move on from there. Even the supplies are pretty inexpensive. But a word of warning, as with all fishing tackle, some things are hot at particular location and/or time. It really is best to tie for the situation and not just amass a huge pie of potentially useless flies (unless you just like doing it).

What I am showing in the picture above is the result of two kits plus some additions. Without much ado, here are the required items.

  • Vise
  • thread
  • fish hooks
  • scissors or X-acto knife
  • materials appropriate to the pattern.

These are the strongly helpful items

  • bobbin
  • hackle pliers
  • head cement

That is it. It is really not that difficult to get started as long as your dexterity is reasonable, you have an adequate workspace with light and space. Some people use a repurposed desk, I am using a dedicated bench, I have tied plenty of flies at the kitchen table and even a card table in front of the TV.

There is more to know with materials, but I think that I will save that for another day. With that, you cannot really separate flies and fishing because that is the whole point. So, I am going to cover some terms that you will come across.

  • Wet Fly – This a a whole class of flies that are meant to spend time under the water.
    • Nymph – this is a type of wet fly that simulates a larva
    • Emerger – This type of fly is when the larva is changing into an adult
    • Streamer – This is a flashy wet fly used in steelhead fishing
  • Dry Fly – This is a whole class of flies that are meant to float on the water. This would be the classic fly.
  • Popper – these are flies that make noise. They are wet flies but make a sound when you are stripping them back in. Bass plugs do this as well.

The world of fly fishing can be confusing because they use some of the same equipment as conventional angling, but call them different names. For instance conventional fishing would call this item a ‘bobber’ while in fly fishing, it is called an ‘indicator’. I think that this is part of why fly fishing appears pretentious along with the catch and release ethic among other things.

A dry fly traditionally used natural materials like hair and feathers. It seems like the whole movement has loosened up quite a bit with flies called ‘dirty flies’. They might have suggestive names or they may be made of any kind of material. This is things like craft materials or rubber legs and things significantly departing from hair and feathers. I guess what I am trying to say is that what used to be very rigid rules about what to wear, what to use and how to do it seem like it is slowly changing.

I have always liked streamers. These flamboyant flies are imitating baitfish. This is where I am going to start because it uses a big hook. This will give me opportunity to practice technique at the same time I have some room to work.

End Your Programming Routine: Next stop, actually tying flies. Of course as I said at the beginning, these first couple are just to get my head right. I am not going to worry about them actually being fishable. That means the right fly for the fish and environment. I think for 2023, I am going to set a goal of catching a fish on a fly that I have tied. I should say try to catch a fish on a fly that I tied.

December 15, 2022 – A Bench Story

Unless you are a coastal steelhead fisherman, the time to tie flies is the winter time. The theory is that you stock up in the down time to get ready for fishing time. At least this is what I hear from the podcasts that I listen to. Fortunately for me, I do live in coastal steelhead country so I really have no excuse to not fish or tie flies.

This is not what I wanted to actually talk about today. I have a secret. My bench in the basement began life as a fly-tying bench. The top was specifically sized so that my vise would be able to clamp onto the top. In fact, I planed down the thickness so that this would work because I had planned on making it thicker. So, this is the story of my bench.

Back in 2011, I started this project of building a bench for my basement. I needed a sturdy space to do stuff. I thought that I would use it to do house projects but also tie flies. I spent a couple weekends milling stock and planning the design. This was an evolutionary effort where I had a rough idea about what my requirements were but the design changed as the wood revealed defects and my mistakes changed things as I went. My progress ended after the first couple of weekends because the cat decided to take up residence with kittens.

That time in my life was a whirlwind. Much of my work week was spent on the road from 2010-2015. I was travelling and working and my woodworking project languished. When you live like that and have toddler aged children, you don’t have the energy or the social capitol to do non-essential things like hobbies. But, I was making some side money in the form of travel bonuses so in 2012, I decided to buy a reloading setup.

The reloading equipment stayed in the box and my bench stayed in parts. When I got my range membership in 2016, then I really started recreationally shooting. I had been carrying empty brass around with me my whole life because my dad was a reloader but it really started piling up when I started shooting monthly. I decided to get back in gear and clean up my shop by finishing this project finally in the summer of 2017.

The reloading press got center stage when I mounted it. My original intention was to remove the press when I wasn’t using it allowing me to tie flies in the center of the bench. I did a lot of reloading but not a lot of fly tying so the press stayed. At this point reloading is here to stay and so is the press. There is room to move the vise somewhere else along the edge.

It was always my plan to have storage underneath the bench. I just didn’t know how I was going to manifest it until I got near the end. The large drawer was re-purposed from a previous workpiece, my home built router table, miter bench that didn’t make the journey back from SC. Before that, the drawer was part of a dog house that I recycled.

This bench is not that old, but it certainly has seen action. Currently, I use it almost daily as the stand for my pellet trap. Guns get cleaned on the bench and a lot of reloading has been done. I have wrapped presents, soldering, chopping and a lot of junk piling too.

I had this vision of using an old computer to stream music and look-up a few things now and then, but I think that machine has entered the end of its life because it doesn’t have the memory to stream larger format items. Right now, it is not really hurting anything where it is, so it will stay there for now. There are other things you cannot see or are not worth much but a mention like a cordless battery charger, a test phone, etc.

End Your Programming Routine: Sometimes things don’t end the way that you expect and sometimes they just take a long time to get there. This has some of both. At this point, I cant really imagine life without this bench, it plays a pivotal role in so many things that I do with content generation and hobbies. I doubt that it will make a move if and when that happens but I guess that is an excuse to build one based on the lessons of this one.