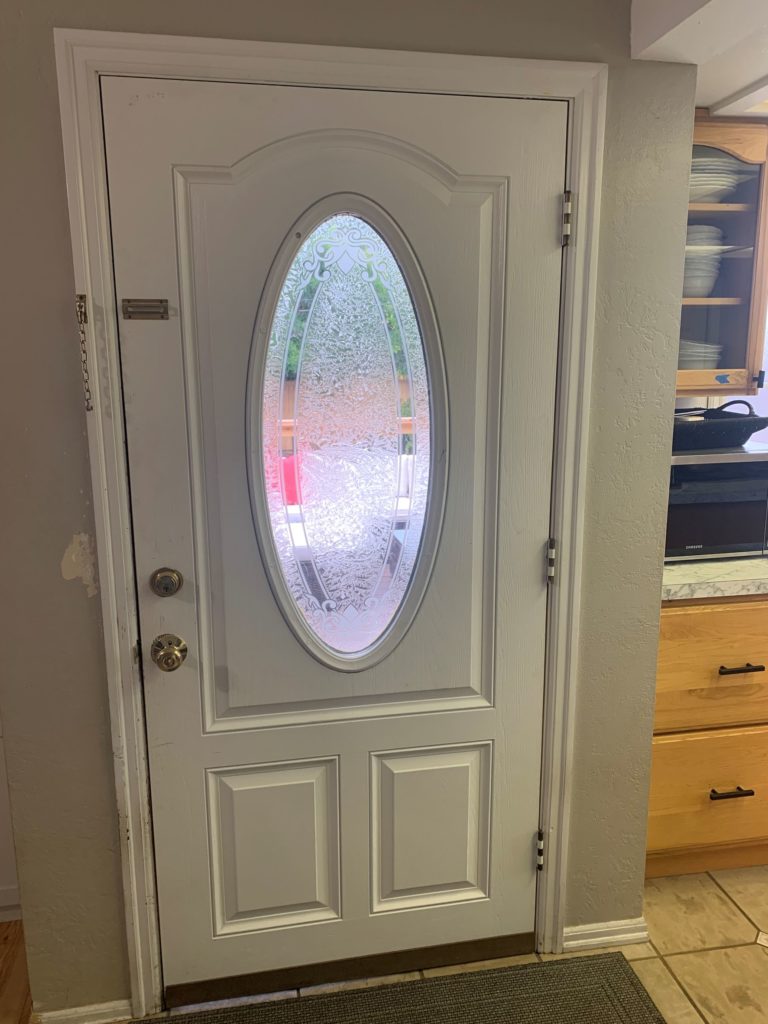
Sometimes new doors are called ‘slabs’ but this also works for used doors. The most important aspect is the measurements. Precise measuring will mean the difference between fitting and not fitting as well as operating properly.
- Measure the dimensions of the existing door and the one that you are wanting to replace. It probably goes without saying, but if your replacement door is smaller than the one you are replacing, this isn’t going to work unless you can figure out some sort of weather stripping to seal the gap.
- Pick a reference point to measure. I like the top, hinge side corner. Take a measurement from your reference point to the top and bottom of each hinge. Also measure the top and bottom of your lock set holes. This is for both doors.
- Now it is time to do some figuring. Is it possible for your door to fit? Does it need to be modified to do so? And if so how?
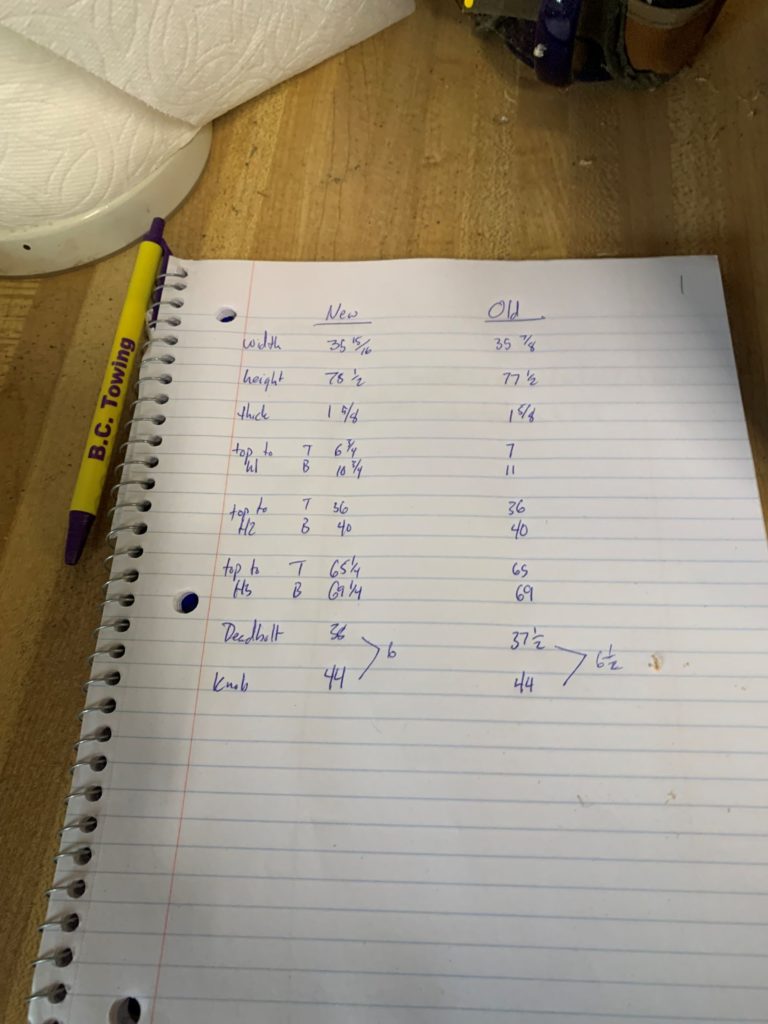
If you look at my measurements, the door wanted to use was wider and taller than the door I was replacing, check. The middle hinge was in the same spot when I measure from the top. So, my strategy was to trim the width off the hinge side and reposition the top and bottom hinges so that everything matches. Since I was measuring everything from the top corner, this gave me the freedom to trim the extra inch off the bottom without consequences.
Unlike hinges, lockset holes are a standard 2 3/8″. This means that I really didn’t have to measure the top and bottom of each hole, I elected to just go from the top of the door to the top of the hole. Note that I measured the difference between the the top of the deadbolt to the top of the operating knob. Also note that the spread is different which means that I am going to also modify the strike plate for the deadbolt to work.
For square cuts larger than an 3/16″, I opt for a circular saw to remove. But, when you start getting into tapers or real thin removals, I use a router with a straight cutting bit against a straight edge. You could also use a hand plane or even better a power plane but that is a tool that even I don’t have. I really didn’t want my hand plane to be removing fiberglass either.
After the door is sized properly, it is time to recut the hinge mortises. I use the Milescraft HingeMate 350 for a lot of extra help. This job can also be cut with a chisel, by hand if you don’t have a router. I already owned and used these templates a couple of times so of course for me it was a no brainer. I actually reviewed this product in 2020.

Despite my best efforts, I still had to modify the width after a test fit. I ended up taking another 3/16″ off the strike side. Ideally, I would have left that side alone, but this was the fastest way to get the door up as daylight was fading quickly. Because I created new fitting problems with the deadbolt and lockset. My backup plan was to put the old door back into place for the night.
End Your Programming Routine: None of this work is particularly difficult but I would say that it is not for the DIY feint of heart. If the door that you are replacing was not installed square or your holes are off, you may be in for a difficult time. You are potentially racing against time and the weather to get the door installed. So keep those things in mind before you start.
Recent Comments