Tag: carpentry details

July 27, 2022 – What Does Mind the Details Mean?

Fortunately, I had a good weekend for project work. I will say that I strongly believe that details are almost never executed properly. It costs too much money to do so. So, that is what I am going to explore today.

1. Painting all six sides. This is the one that is the most frequently skipped and the one that takes the most time. I like to get two coats on the exposed face of the parts before installation. Then I come back and fill holes and do a final touch up. To put more simply, I prime all six sides. Then I paint the exposed faces twice.

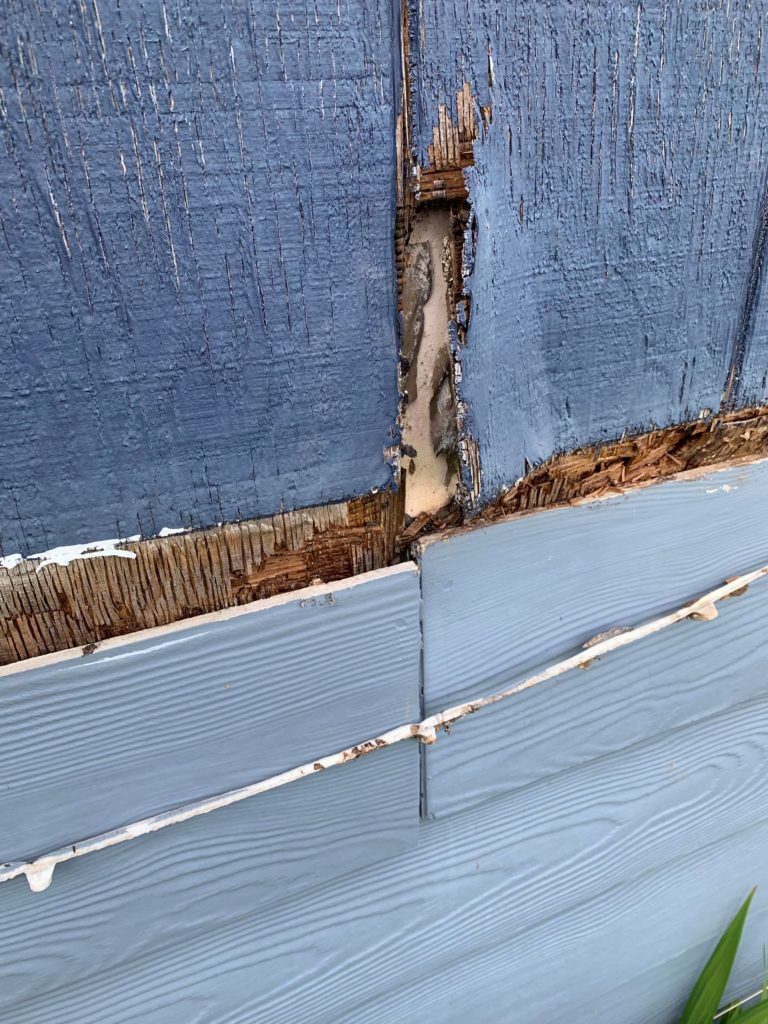
2. Caulk is not a building material, it is more like gap insurance. It is there to prevent water from getting to a properly detailed assembly and for aesthetic uniformity. In theory, caulk should be unnecessary. From my informal observation, I have only seen one caulk remain flexible and intact after five years of exposure. That is OSI Quad. Be aware, this product is not easy to tool as it is solvent based which is why I rarely use it. This caulk joint shown below has failed. I know for a fact that it is not flashed behind the trim.

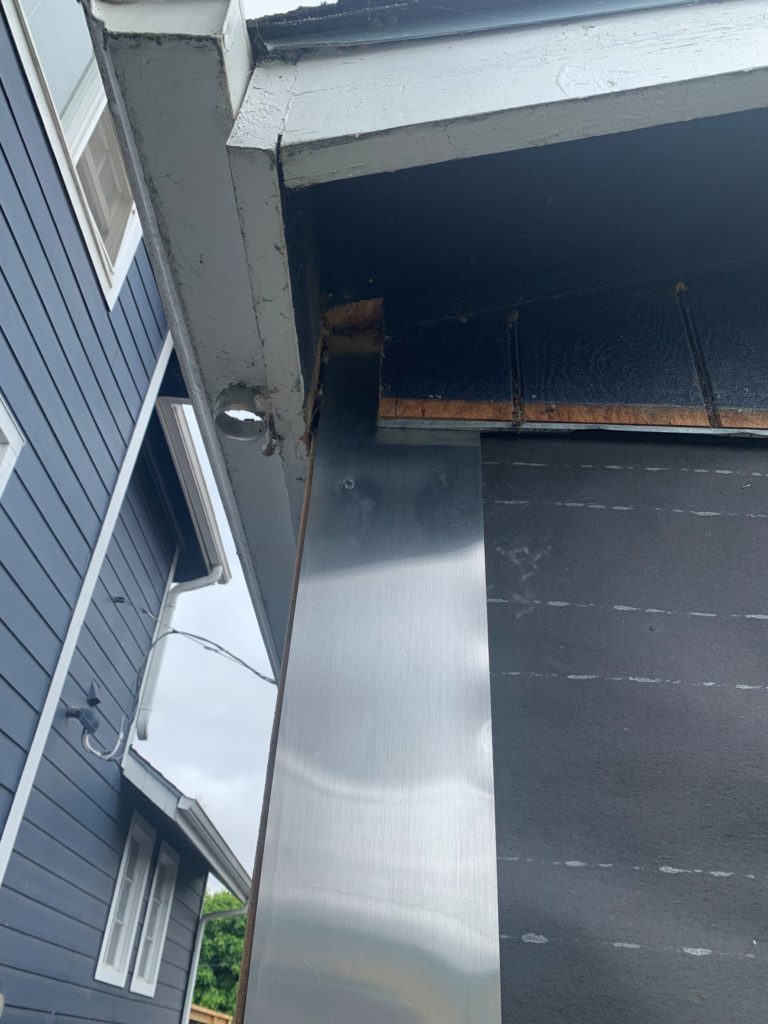
3. Flashing has a proper order and should be used more frequently. Flashing is what mitigates caulk failures. Today’s installation guidelines for Hardi plank or LP call for a 3/16″ gap between adjacent edges. Those gaps must be flashed for proper water protection. Caulk if you choose, but expect failure and consistent maintenance. Notice that the z flash is on top of the trim flashing.

4. Fix your mistakes a you go. Here, I miscalculated my board length because of the offset from the corner trim. The truth is the board wasn’t even a true 12 feet, it was actually 12′ 1 3/8″, so it would have never lined up properly. What is the harm? Not having joints line up on studs leaves them susceptible to eventual warping because there is not enough structure to nail the trim and secure them adequately.

5. Building materials are expensive, do the best job you can with the best possible materials. As the saying goes, 80% the work in painting is in the prep. Sure, good paint is $90 a gallon but after you have spent hundreds of hours getting ready, don’t cheap out on something less than adequate. It just shows that you don’t actually value your time.

6. There is a time and place for shortcuts. That place is not while the project is happening. Think about this, you probably don’t need to rebuild your car’s engine because the air conditioning stopped working. However, if you do want to rebuild the engine replace all of the wear parts whether they need it or not. I am talking about things like bearings and seals. Shortcuts are for eliminating or delaying the need for the project.

7. Finally, I want to say that we all make mistakes. The difference between a professional and an amateur is how to recover and not get derailed.

End Your Programming Routine: I have been thinking about making some Tik-Tok length videos with one tip per video. With everything that is going on outside of my project, I have a difficult time actually scheduling something extra. It’s weird but my YouTube subscribers keep growing despite the fact I am hardly active. It might be worth putting a little more effort into it.

May 4, 2022 – The Details Matter

Do you know why I am skeptical about all of those makeover shows on TV? It is pretty easy to make something look better but have be done poorly or improperly. There have been a number cosmetic improvements made to my house that did not have sound building practice implemented. This one is a continuation of my apartment remodel I talked about in 2020.

This leads me to my summer project. I have a major problem with my siding on the garage and it looks a lot like what lead me to a summer rebuilding the cottage. I guess we will see when I get into it.

The first problem is visible on the left. The facia is rotting to pieces. I cant claim that I didn’t know about this. In fact, I saw signs of the problem before the house was painted in 2016. They of course painted right over it and didn’t say a word. This one I cant really claim is an improper technique but a failed material since I can only assume the pair were applied at the same time and have the same exposure.

My biggest challenge with this part of the project is going to be how to attach the facia again. I can only assume that it is nailed through the decking at the edge since there are only two attachment points sticking out of the structure, at the ridge and at where it meets the side facia. This may mean a roof job as well, it wouldn’t hurt but we will see.

The far more insidious problem is the one on the right. From what I know, this garage was built in the late 1990s. The pictures we have of the house, the band of lap siding was added by the previous owner (not the one that built the garage) as an attempt to spiff up the place. They only owned the house around a year and he claimed that he got interested in airplanes so this wasn’t a flip. But let’s be honest, T1-11 was an inappropriate siding choice for a Victorian.

The construction detail problem may not be evident from the picture but I will cut to the chase. The Hardiplank was applied over the T1-11. That bead of caulk hanging down was on top of the edge. That was the single line of defense for water getting behind the lap siding. Once water got behind the siding, it was trapped.

I suppose the good news is that it lasted at least 17 years. The other good news is that this is the last place I have to deal with this problem. This detail has failed everywhere else on my house, my apartment and the garden shed. The bad news is I really don’t know the extent of the damage. So even thought I knew about this weakness I think good advice is don’t go looking for problems that you don’t want to deal with.

Also worth noting since we are talking about good practice is if that detail was sufficiently protected (as in an eve or overhang) it would have never failed. The two sides of the garage look rock solid because they don’t have the same exposure to wetness as the face that I am showing.

Another thing that you can see from the picture is that there is drywall behind the panel. Interesting… this may be a code requirement. I notice that on the inside of the garage, there is drywall on the exterior that is facing the house. I am sure that the intent of this is as a fire barrier between the two structures. However, I find it curious that the exterior wall perpendicular to the house also has it. I think what is worse is wet drywall is a sponge for water. I am concerned about structural damage.

End Your Programming Routine: Now you can see why I am not going to work on the fence. The fence needs to be done and quickly. This one also definitely needs to be done, but I can use the warmer and drier months to do it. I also want details that I would never get from a contractor like back priming all of the siding that replaces it. I want proper flashing and I want to solve this problem permanently. I hate to say it but hiring it out will get me another 17 years or less.