Tag: bathroom fan

March 4, 2026 – Troubleshooting 201

I won’t assume that everyone reading this went to college. We hear the term 101 thrown around all the time, but what does that mean and what is the difference between 101 and 201? Well, 101 is a survey level course. In the case of Chemistry the year long sequence of 101, 102 and 103 attempts to cover three different disciplines of chemistry in a year long, high level series of courses. If you ask me, in many ways the 100 series is the hardest because the student is not given any basis for understanding the disciplines as they are intended for non and unrelated majors.

In contrast to the 100 series, the 200 level courses are intended for students that are going to go forward in the area of study. This means that the topics are harder and deeper with more emphasis on the why and not just the what. Today I am going to cover, why is the bathroom so cold?

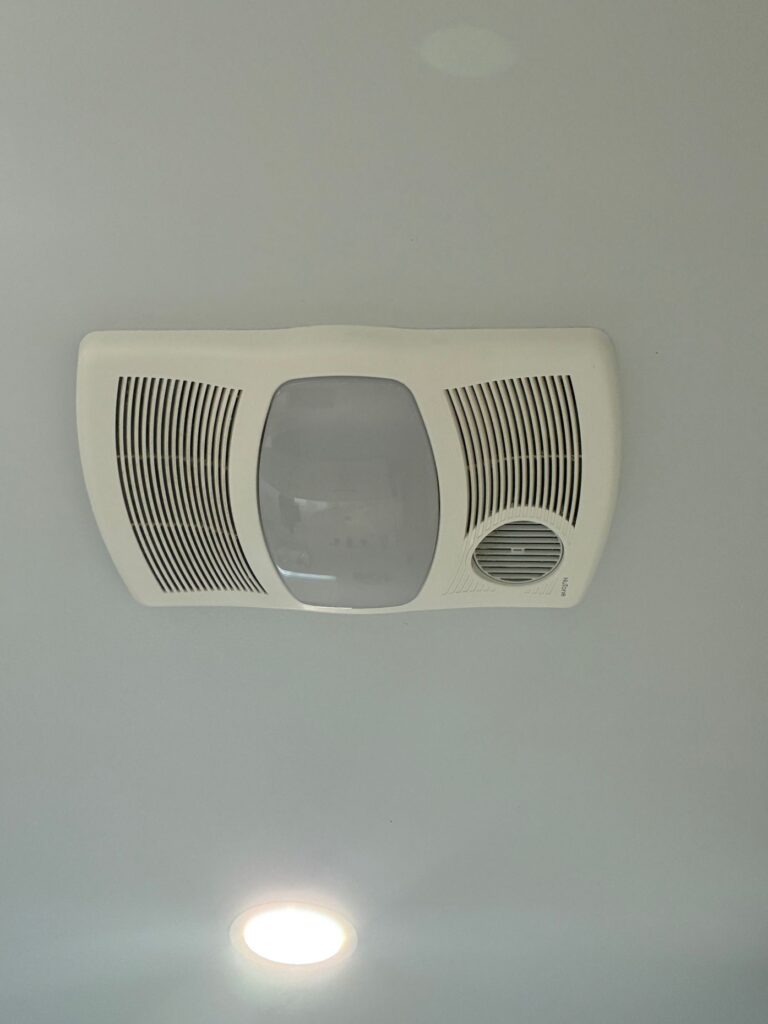
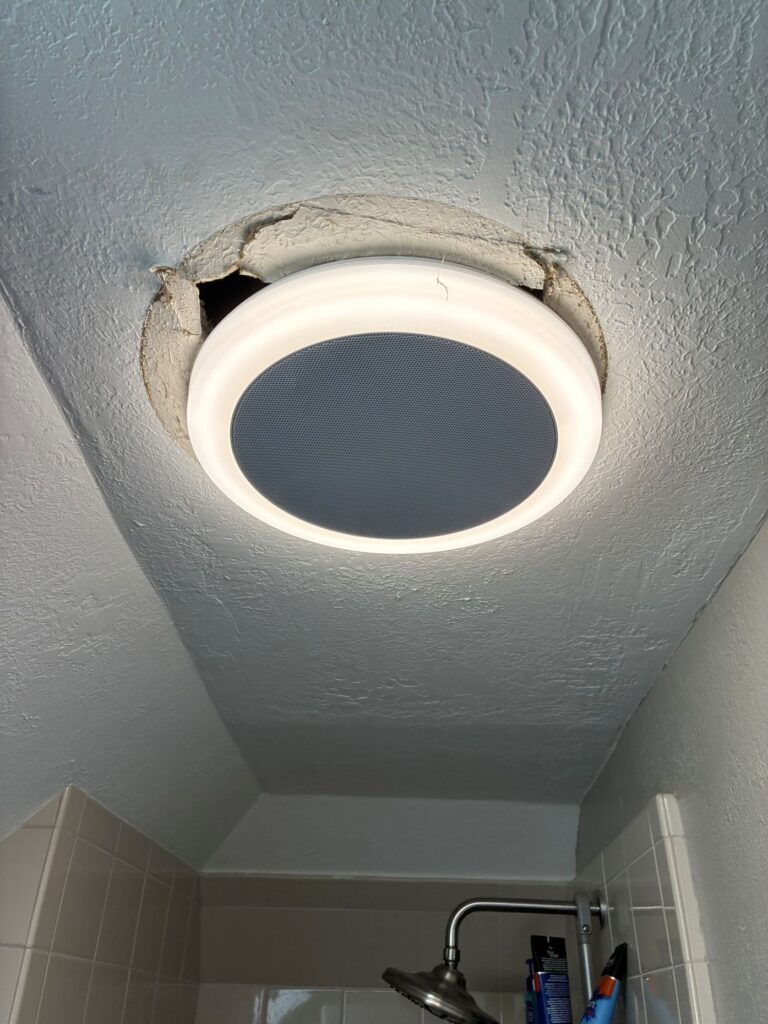
From the first picture on the left, I see a bathroom fan with an integrated heater. It is not heating. This means that it could be broken or it is not wired correctly. Those are really the only two options. When I look at the picture to the right, I see two switches. One controls the lights in the bathroom and the other controls the fan. Based on what fan switch does, it should turn on the fan, a heater and a light. Only the fan worked.

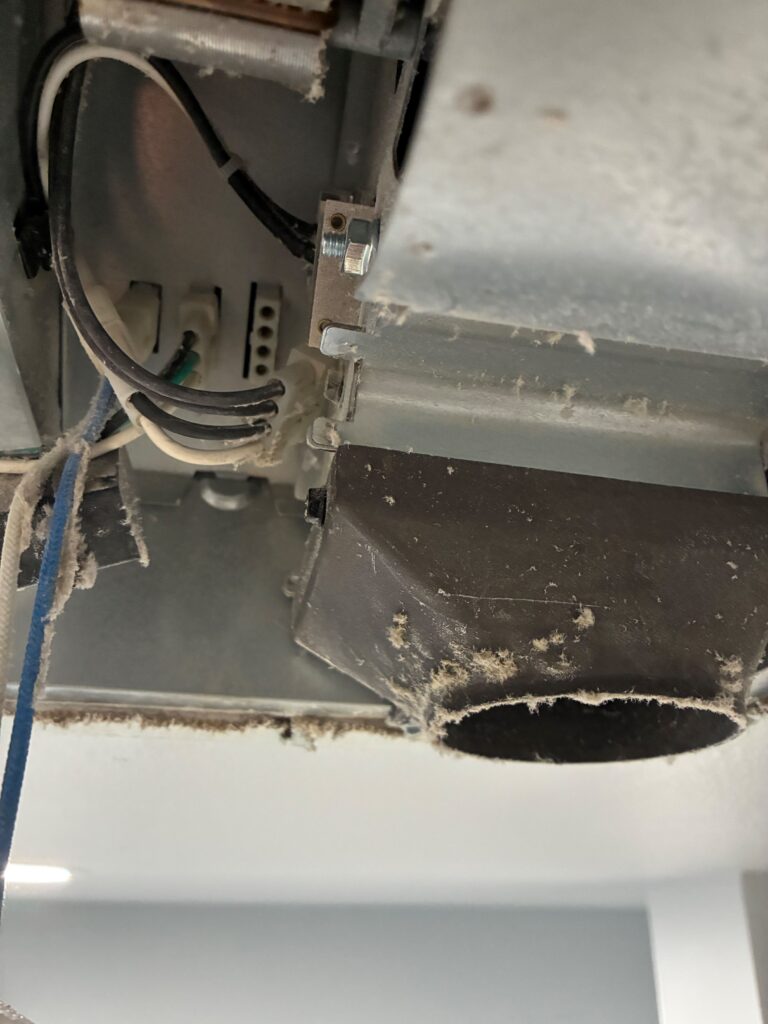
That cannot rule out either of my hypotheses yet. It is either miswired or broken. I took the cover off of the fan. Low and behold there was a connector that was not connected. This is missing heater connection. I plug the connector in and turn on the switch, the heater belches and smokes to life. The problem now is that there are three things and only one switch.

This is a permissible mode of operation. What I mean by that is that power to the unit turns on the light and the fan and the heater. But, does that make any sense? I say no. Imagine that this is summer and now the heater is on every time the fan is on. Further to that, you are now blowing heat into the room and then sucking it out with the fan. This seems wrong in my book.

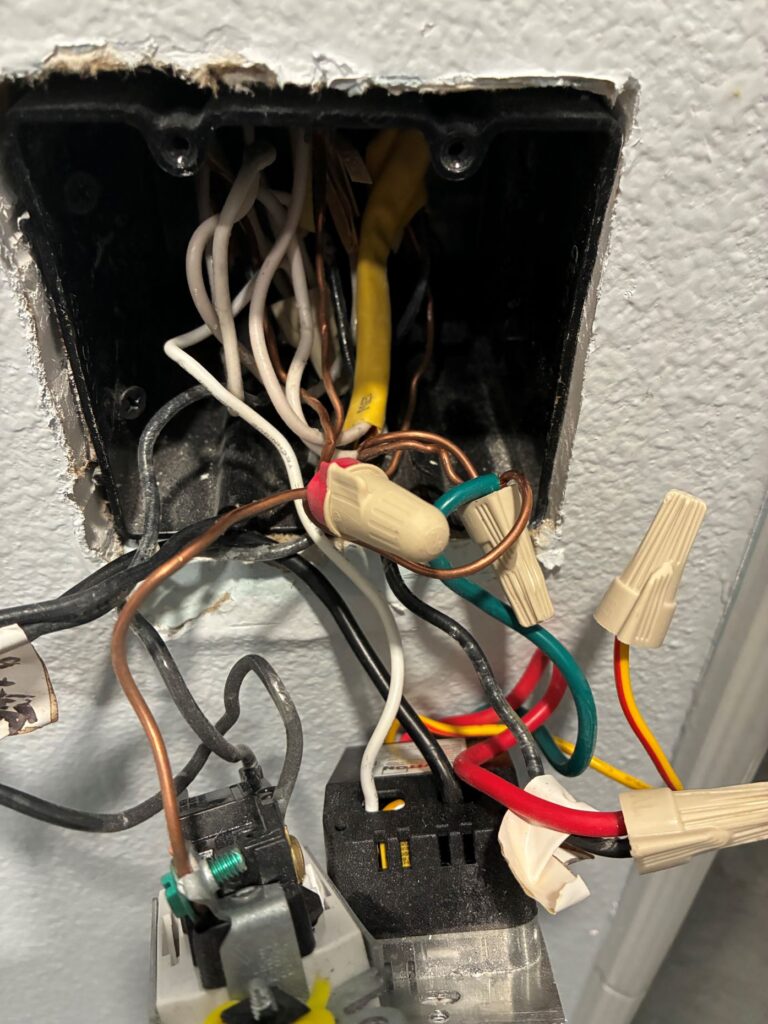
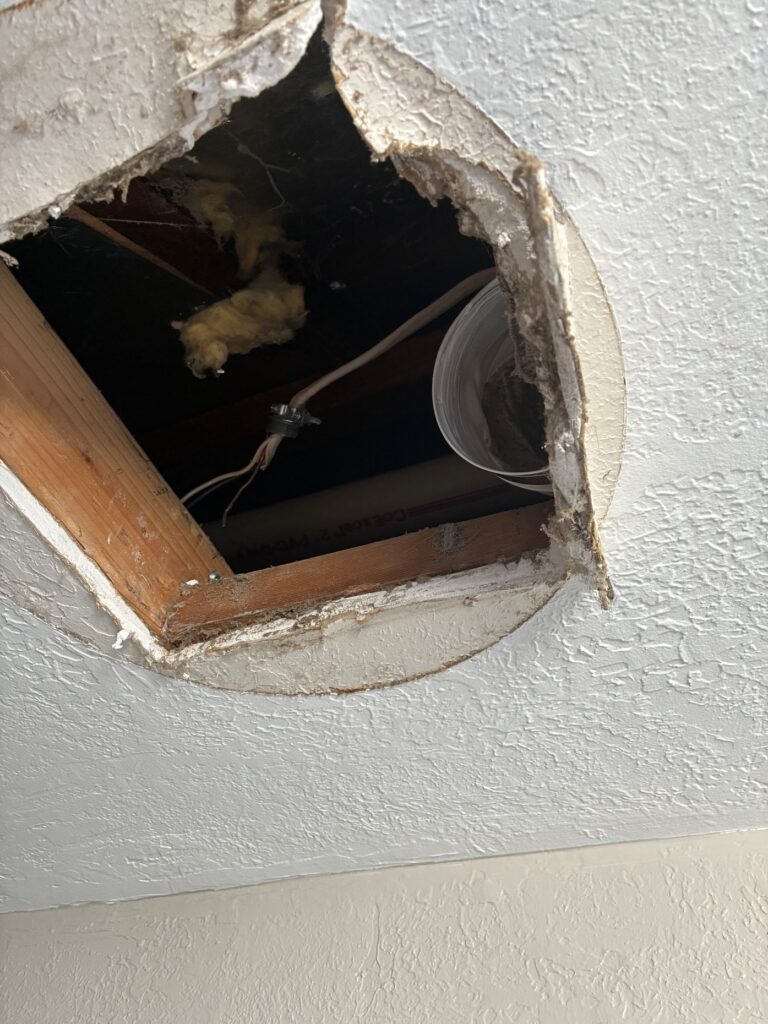
When we installed a similar unit in the ADU a few years ago, I separated the heater and the fan operation. That way you can have heat or the fan or both if it makes sense. In order to do that, you have to look at the wiring. I pulled the switches out to determine if it just wasn’t wired correctly. You probably can’t tell from the picture below but unfortunately it was not wired for separate operation.

Certain devices benefit from a more complicated wiring scheme. Take for example a ceiling fan. Before remote controls and external switches, it was very common to wire two hot wires to the fan. That way you could operate the fan and the light independently. Today you can control most ceiling fans at the device so that makes two hot wires irrelevant.

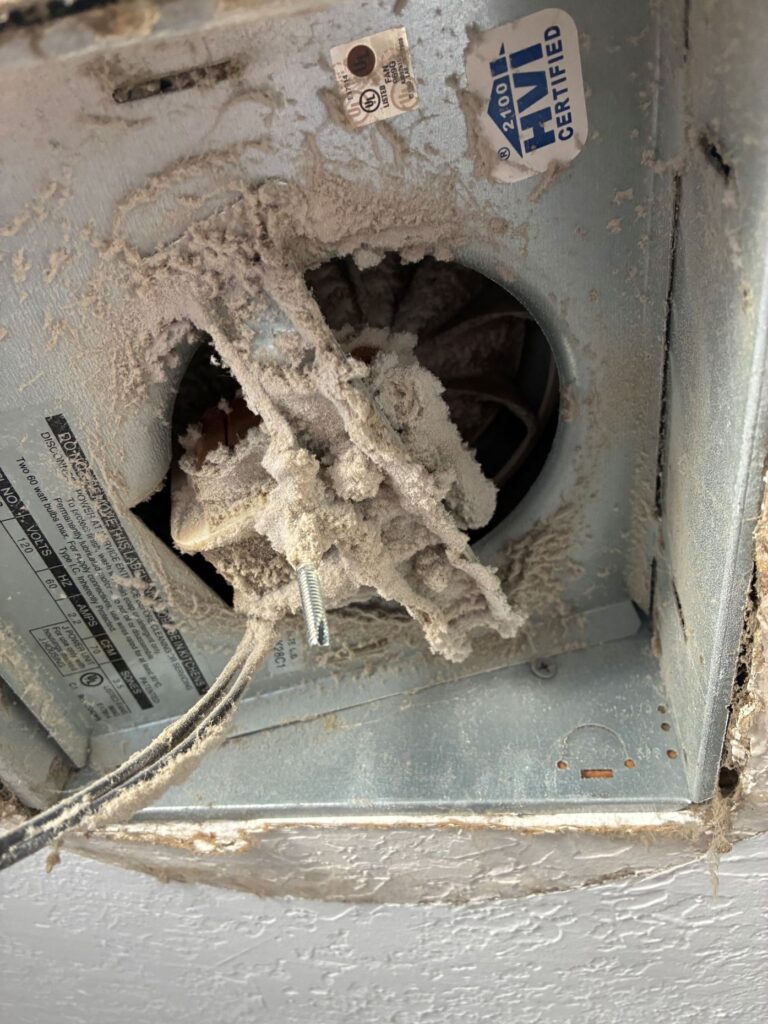
In electrical vernacular, the cable operating the device is labelled 12/2, 12/3 or 14/x. The first number is the wire diameter and the second number are the number of conductors in the cable. Without getting too deep into theory, 14 gauge wire is for 15A circuits and 12 gauge wire is for 20A circuits. This particular heater is a 1300W heater. If you do the circuit math, the total load is 15A * 120V = 1800W. The means that the heater could be on either a 15A or 20A circuit. I know it is 12 gauge wire because the cable insulation is yellow. But, what I do not see is 12/3 cable. Based on how the switch is wired, it is not possible for independent control.

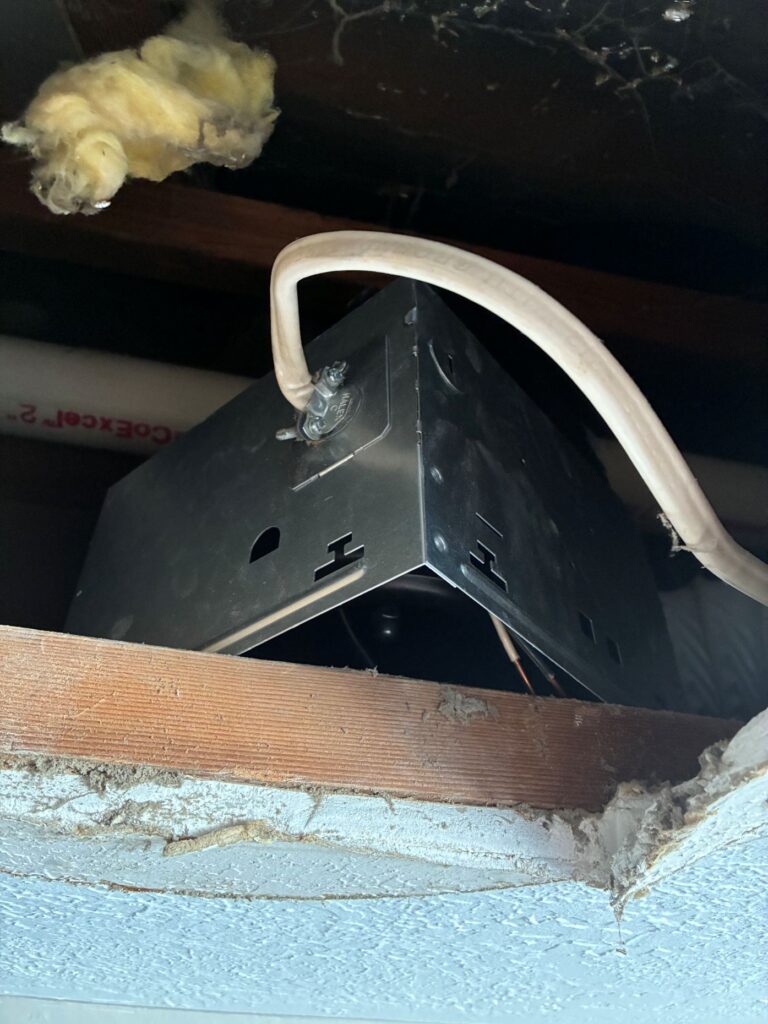
To fix this situation, a cable would have to be pulled from the fan to the switch containing three conductors instead of the two conductor cable that is currently in use. OK, I don’t like that but it is doable. When I look at the other bathrooms, it gets more complicated. The pictures I am showing is the bathroom with a fan/heater combination already installed. To upgrade the other bathrooms, the overall circuit load has to be considered.

What has been standard was 15A circuits for lights and 20A circuits for outlets. Doing the math again, 1800W/ 60W = 30 permissible bulbs on one circuit. In old houses, you might even have all the lights on one circuit. In these days of LEDs, light bulbs are drawing 10-15W. That is now 120 or more permissible bulbs on one circuit. Not only is this power efficient, but it means that the lights can be on while you work on the outlets or other electrical concerns.

That is one way of wiring, the other is to have all terminations on one circuit. This means the lights and the outlets are all part of the same circuit. According to AI, a hairdryer uses about 2000W of electricity. That means one device is taking the entire circuit load on a 20A circuit. There is simply no way to add a 1300W heater and operate a hairdryer at the same time. This means running a new, dedicated circuit. Not only is the wiring from the fan to the the switch inadequate (but perfectly acceptable for just a fan only) but the power requirements are simply not there.

End Your Programming Routine: As I have stated previously, this new house is in a heating climate and the heat that is available is completely substandard. The good news is that one bathroom has the capacity to be fixed and operate properly, the other two are going to take more effort. It is my opinion that the house was miswired and even poorly designed. While not code to have heat in the bathroom, it is required in certain loans (not ours). More so than any of that, the house is simply uncomfortable. We aim to rectify that.

April 29, 2025 – He Who Smelt It, Didn’t Fix It

Bathroom fans are a dubious proposition. We want industrial hood suction with a consumer level price and engineering. I for one am somewhat skeptical on their effectiveness as it seems like fan off/on seem to have the same results. This particular fixture has always had weak lighting and now the fan has stopped working. It may be worth trying to diagnose but an upgrade in lighting is certainly in order.

I am amazed at the number of options today. When I was last looking at fans a couple of years ago there were a handful of choices. I didn’t buy one because the volume I wanted was on backorder. Those choices were largely based on fan volume. Today, there is a whole isle of bathroom fans. Later I learned that there was nothing wrong with the fan at all and what I thought was a bearing was a loose cover connection.

I have replaced this fan once before, so I am confident that this job is easier than it could be. If your fan is original to the house, your job is going to be much tougher as it is likely attached to the structure in a way that is not accessible from the finished space. This means that you will have to come up with a way to cut and chop your way through the fan body to get it removed.

I suspect that this fan overheated due to dust (or see below). The easiest fix would be to simply replace the fan motor. In our case, the light is so poor that we are going to upgrade the fixture. Replacing the motor is about an hour job, replacing the whole fan, box and all is probably an eight hour job including multiple days of finish work.

I did find out when I took the box out that a squirrel had made it’s way down the vent pipe and stashed a walnut in-between the flapper vent. For all I know, maybe that is what caused the fan to burn out. At the very least, this should help with heat loss and better ventilation for that matter.

Make sure the power is off. If you are confident that your wiring is conventional, then you should be able to leave it off at the switch. But, if you are not, then you will need to find the breaker. Next, remove the electrical connections. In this fan they are made underneath the plate that you see. That means that you will have to figure out how to disconnect the fan from the box. Detach the box from the framing so that it is only connected to the duct work. Finally, disconnect the duct and install in the reverse order.

Now is time for the pro tips. I did have to cut out my old fan box to remove it. I was not expecting that but it had to do with the wiring clamped outside the box. Second, I did have to modify the new fan. The first modification was that I cut the new work tabs off of the box so it would fit in the hole. The second modification I had to make was I had to disassemble the entire fan to make the electrical connections. There is no way to use a wire clamp (middle picture) when the box is in place. None of that is in the instructions. Finally, the new fan box is quite a bit smaller than the one that it replaced. That means that there is drywall repair to be done. I am still working on that as I type this.

End Your Programming Routine: I have to be honest, this job requires a lot of different skills such as electrical, HVAC and drywall finishing. If you could find someone to do the work at a fixed rate, you would probably time ahead unless you are pretty darn good. Since I had done this a number of times, I thought it would go quicker than it did. And even though I can handle it I found myself frustrated at points and sweating a lot.

November 9, 2021 – Troubleshooting a Failing Bath Fan

We have lived in this house over sixteen years. Since the week we first moved in, I thought that a bearing was bad in the fan unit since it made a vibrating sound. I was even going to replace it one time about three or four years ago but the shelving stock was out. I looked for several months thereafter but then forgot about it.

Instead of just being noisy, it started getting to the point of not actually working. You could hear the power applied but the fan wasn’t moving always. Sometimes, flipping the switch a couple of times would get the fan going, sometimes not. I decided that now was the time to finally do this.

I checked the availability at the box store and it was in-stock. My experience over the years has taught me to visually inspect the unit before doing anything. I wanted to make sure that I was replacing the unit as quickly and painlessly as possible. You could say a like for like swap is what I was looking for.

Much to my surprise, the fan was not a 50 CFM unit but a 70 CFM unit even though the bathroom is only 3×5′. So I started looking a little closer at my ordering options because I was not going to be able to go to the store for several days. When I looked on Amazon, I realized that I would not have to tear the entire housing out like I had done with the two others I replaced but I could swap the motor/fan assembly out only saving tons of effort.

Then, I went to the local hardware store and bought a replacement motor/fan unit. When I took the unit apart to replace the motor, I think I identified multiple issues.

If you see how dusty the outside is, you can imagine that there is 30 years of dust caked on the motor and fan. I suspect that the dust on the outside of the motor housing was causing the motor to overheat. I didn’t bother cleaning it and putting it back since I thought there was also a worn bearing causing noise.

My wife really wanted a new fan since the outside bezel was yellowed from age but I convinced her that I could just spray paint the old one and it would look much better. Before I started painting, I stuck the screw back in the housing so it wouldn’t get lost in the process. The screw was not what originally was part of the unit and when I turned on the fan, it was vibrating and making a ruckus while it was not holding the bezel tight. In the end, I decided that the noise I heard all those years was the screw vibrating and not a bad bearing.

When I put it back together, I put several wraps of teflon pipe tape to give some extra dimension to the screw and hopefully act as some padding. The fan is still loud because it is oversized for the room but works like a champ. I cannot say how much less effort the replacement motor is over a whole new unit. However, it is more expensive – imagine that but the cost was worth it.

Over time, these units do suck up dust and it ends up coating the electrical components. The one in the master bath I have cleaned several times because I can see dust on the outside, but never this one. Periodic maintenance would be recommended for long life.

End Your Programming Routine: The lesson that I would like to push today is look and understand the failure. It is highly possible that there was nothing wrong to begin with other than the dust needed clearing. This is at least the fifth fan that I have replaced but I never knew that a replacement unit could slip into the existing housing. So, I suppose $40 was a good investment in education.