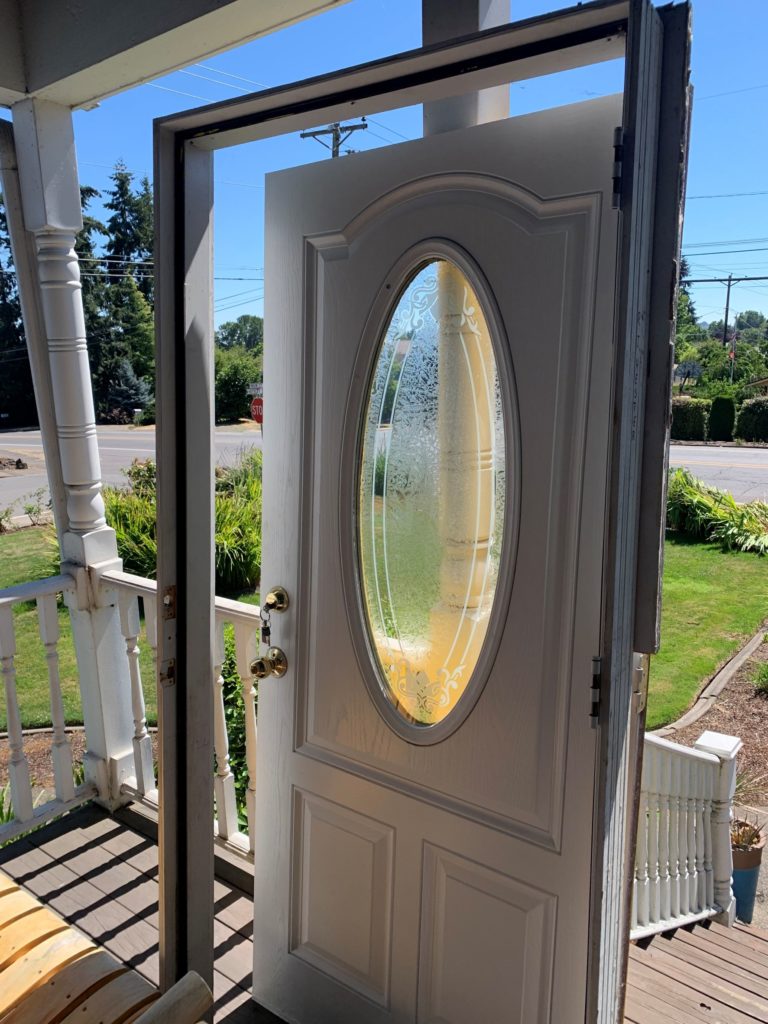
My wife has been hounding me to get new doors for years. I like the look of the front door, but it has never operated the way it should. I have messed around with the lock sets and the screws holding the door in place but it is no use. It is imperative that doors are installed plumb and level for them to operate to expectations. I finally gave in and when I take a level to the exiting door, it is way out of whack. Now it the time to finally get a door that works properly.
Generally speaking, a pre-hung door is simpler to handle than just a door blank. It should be cutting the entire unit out and replacing the entire unit. Getting the entire unit plumb and level should be easier as well because the door should operate within the frame correctly.
Of course, you can always get a door out by destroying the frame. And if your door works properly, you could just replace the door and not the opening. In this case, I am going to put the front door in the back because my wife want’s a little more privacy than the current back door offers. And since it is easier to install as a unit, I am going to talk about the way to get the door out without destroying everything.
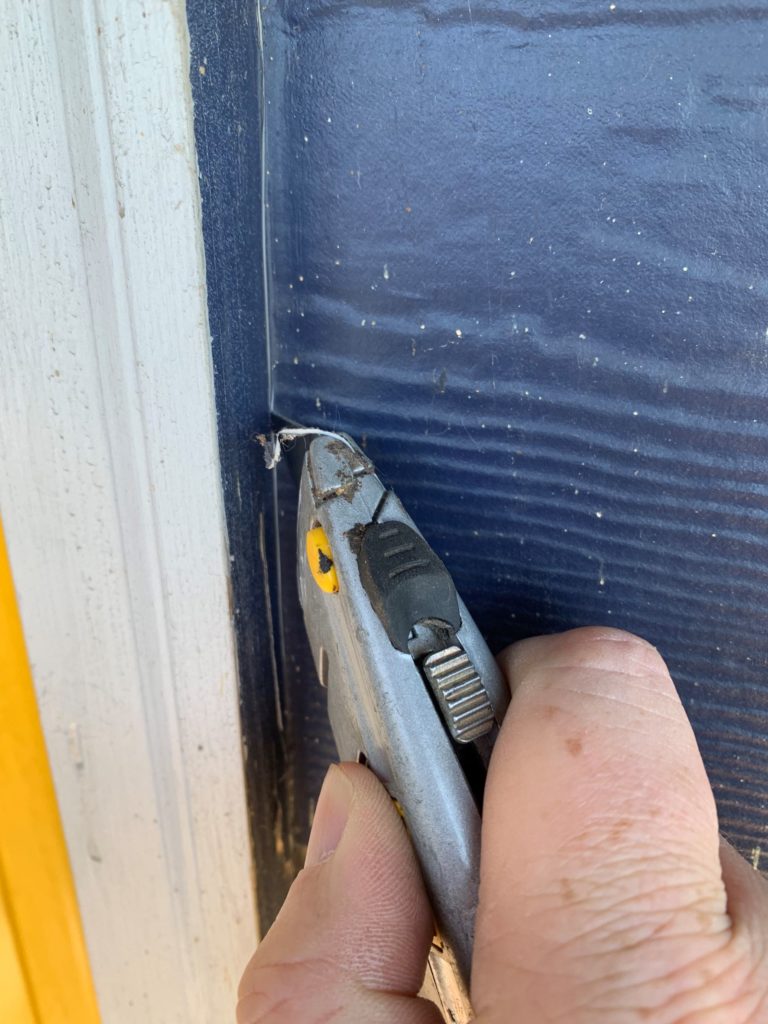
Step 1, Cut all caulk and paint lines around the trim, inside and outside the door using a utility knife. Note: in a pre-hung door, the exterior trim is typically part of the unit. Make sure it is all the way free before prying on anything.
Step 2, Carefully remove the interior trim so that it can be reinstalled.

Step 3, Locate the fastening mechanism of the door frame to the structure. Some use screws through the hinges while others are face nailed through the frame itself. If screwed, remove them. Also, consider not just the hinge side but also the strike side. Long screws are often used to secure deadbolts. If the frame is nailed, it is best to cut the nails with a reciprocating saw.
One other tip, if you can see shims in between the door frame and the structure (like the picture above, upper left corner) it is a good bet that there is a nail or screw in that spot. Shims are uses to get a solid backing to nail/screw through so that the frame stays square.
Step 4, If the frame is free on all four sides, then carefully rock the the entire assembly out of the rough opening. I find this easier to do when the door has been removed from the frame because it is a lot lighter
If all goes well, you should have a door and frame that you can use somewhere else or even donate. As an FYI, most contractors do not take a lot of respect or care for re-use. So, if you hire someone to do this job, don’t expect that you will get a re-useable result unless you specifically ask for it. Also, expect that it will cost more because being delicate takes time. I missed my chance at salvaging fence boards because they just cut the panels and threw them away before I could talk about it.
End Your Programming Routine: Sometimes things are easier said than done. For instance, it looks like there was caulk/adhesive added behind the door frame but it somehow missed the installation and therefore the door wasn’t stuck to the structure. What I would have done in that case is sacrifice the outside trim to try and keep the rest of the door frame together. Overall, this took me about two hours. I will talk about installation coming up in the future.
Recent Comments